|
Oregon Caves
Oregon Caves Chateau Historic Structures Report |

|
PART IV
Exterior Assessment and Recommendations
Roofing and Flashing
The roof of the Chateau is formed by a series of intersecting shapes. The main gable, running north-south across the center portion of the building, intersects two main cross gables over the north and south wings. Two large gabled dormers project from the northern and southern sides of these wings, facing out to the surrounding hillsides. Two small gable dormers were cut into the main gable at the time of the sprinkler system installation in 1950. The third floor guest rooms are covered by the two gables of the north and south wings, and shed dormers that protrude from the east and west sides of the main north-south gable.
 Roof, general field on the east side. |
This complex series of roof shapes and intersecting forms is unified by the treatment of the roof. It is covered with wood shakes, 1/2" thick and 24" long. The exposure varies from 9 to 10 inches, but is consistently within this range. There are two layers of shakes on the roof, both split and re-sawn. It is evident that a second roof was applied over the original shake roof, keeping the same exposure and character of the original. This second roof was applied sometime after 1950, when the two small dormers were added in the attic on the east and west sides of the building.
The roof is supported by full dimension 2" x 6" rafters, 24" on center. The roof peak is created by the intersection of the rafters, and there is no ridge member. Eight inch lap sheathing is used as the substrate for the roof, and is not fit tightly together. There are small gaps between each piece, typically less than 1/8". The 3/4" thick sheathing is laid horizontally, and is covered by building paper beneath the bottom layer of shakes.
 Fascia board for gutter. |
The top layer of shakes is beginning to deteriorate. While the attic has remained dry, the shake roof has steadily deteriorated. There are many missing and broken shakes, and most are curling. The exposure is larger than the recommended length of 7-1/2" as described in Architectural Graphic Standards, but the shakes have weathered fairly well. The formula for exposure is given as (Length-2") / 3, which results in the equation of (24-2) / 3 or 22 / 3 = 7.33. This is rounded up to the 7-1/2" dimension given on page 76. A ten inch exposure is typically reserved for vertical surfaces, according to Graphic Standards. The ridge shakes, also experiencing areas of missing and broken pieces, are cut to fit tightly around the projecting rooftop sprinkler system.
The Chateau does not have a gutter system; instead the water is allowed to run off the roof at the edges. The rafter tails are exposed, as is the sheathing beneath the eaves. The only area that the rafter tails are covered is above the main entrance to the hotel lobby on the south side of the building. A 2" x 6" board has been nailed to the rafter tails to serve as a backer for a gutter that is not in place during the winter. This board is allowed to project slightly out from the edge of the eave, and as a result all of the runoff above the board flows over it. The board is saturated in periods of heavy rain and snow melt, and the moisture is wicking into the ends of the rafter tails above the door. The sheathing in this area is also wet as the water travels through the rafters and fascia board.
The wide overhangs of the Chateau have created problems in one area. On the west side of the structure, in the southern valley that runs between the intersection of the south wing cross gable and the main gable, the sheathing is broken. This is most likely due to snow loading, since the area is protected from sunlight during the winter months as it faces north.
Another problem of the overhangs is that the rain is not allowed to reach all areas of the roof and wash them free of debris. Moss and lichens have begun to grow on the roof in areas that are protected from the weather, especially under the shed roof sections on the north and west sides. The growth is uphill of the drip line of the eave above. The shed roofs that project over the lower entrances to the building are suffering the same growth problems. The entrance to the coffee shop and dining room from the pond area are experiencing heavy growth, as are the roof structures over the stairs to the boiler room and outside entrance to the kitchen.
 Sheathing damage. |
 Growth uphill of drip line. |
 Small dormer, west side. Note the damage. |
The roof valleys are flashed with galvanized sheet metal that was historically painted with a red lead paint to protect the metal. The valleys are all open, and the flashing has been crimped to prevent runoff from one roof plane from running under the shakes on the opposing roof plane and infiltrating the wood structure. These valleys are losing their paint as years of runoff have eroded the paint surface. In some locations the zinc galvanized coating is also eroding, and the valley flashing is beginning to rust.
An access panel, located in the attic just east of the chimney, provides a close look at the chimney area and roof. From this vantage point the problems with the shakes are readily visible.
 Rooftop sprinkler, main ridge. |
Just south of the hatch and chimney is a large area of sheet metal roofing that is woven under the step flashing of the chimney. The sheet metal was originally galvanized, but over the years the zinc galvanizing has worn off, leaving exposed steel sheet metal. The hatch itself has galvanized step flashing woven in with the shakes, which is coated with red lead paint. The hatch cover is removed by lifting it off of a projecting frame, allowing inspection of the hatch. The hatch is clad with sheet metal, lapped and painted with a red lead paint. The original design provided for the hatch to be held in place by its own weight, which proved to be insufficient. The hatch has blown off of the projecting frame from time to time, and as a remedy it has been connected to the building temporarily with a piece of 12-gauge wire wrapped around the rooftop sprinkler system pipe.
Recommendations for Treatment: Roof
The treatment of the Chateau roof can be broken down into seven different components. These are both short and long term solutions, and are also basic maintenance. The recommendations for roof treatment are:
Keep the roof valleys clear of excessive snow loads. One valley has already received sheathing damage due to overloading, and the historic fabric has been compromised. The damaged area should be repaired before the next winter to avoid further damage.
The fascia board for gutter support should either be removed or the gutter permanently installed. The concessionaire has undergone a Section 106 review for the addition of a gutter above the main lobby entrance, and is allowed to place a gutter at this location.
The roof hatch near the chimney should receive a more permanent locking mechanism. Providing a set of stout latches and hinges would protect the door from being blown off of the building, and would reduce the risk of the hatch being dropped inside the attic after removal and falling through the historic fabric of the ceiling.
The growth on the roof should be kept to a minimum. A moss killer should be applied to the roof to reduce the growth, protecting the shakes from accelerated decay. Care should be taken when applying the chemical so that excess does not fall to the ground and damage vegetation around the eave line of the building.
The sheet metal roofing between the chimney and the ridge should receive a new layer of paint to protect the metal. The material, galvanized steel, is still sound, but neglect could result in further decay of this system, allowing water to infiltrate the attic space. The joints between the sheets should be inspected to make sure they are weathertight before the area is painted. If repair is necessary, the work should be done prior to painting.
The galvanized metal in the valleys should be repainted before the galvanizing is compromised. This needs to be done with care to avoid excessive amounts of paint on the shakes. The valleys should be cleared of debris and inspected for damage prior to painting.
Within five years, the roof will need to be replaced. The number of broken and missing shakes increases every year, and while the attic is dry at this point the chance of water infiltration into the building envelope increases every year. The historic exposure, texture, and thickness should be maintained, and the ridge detail should be kept the same. A copper or galvanized ridge flashing may be installed to curtail moss and lichen growth on the roof, but will not help in areas that are under the eaves. The fungicide should be used to control the growth on the roof. Replacing the roof would be an ideal time for other work outlined above, including valley flashing inspection, repair, and painting, flashing the fascia board above the lobby entrance, and repair of the sheet metal above the chimney. This work should be completed before the roof begins to leak, compromising the building envelope. The roof should be replaced in-kind, with resawn shakes.
Keeping the snow load from becoming excessive and the use of a fungicide are maintenance operations that should be performed on a regular basis. The roof replacement, while costly, will help protect the building and preserve the integrity of the structure and interior finishes.
Brackets, Verge Boards, and Purlins
The roof structure is complemented at the exterior by the existence of log brackets, verge boards, and log purlins. These elements serve both a decorative and functional purpose throughout the building.
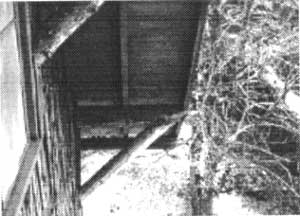 Gable end bracket, northwest gable. |
The log brackets are present in the eight major gable ends. These are either peeled or unpeeled, depending on the location. The brackets are nailed to a 2" x 6" board that is bolted to the building's wall structure. A diagonal member runs up from the base of the board to support a horizontal member, forming a triangular bracket. The brackets extend approximately six inches past the outside edge of the verge board. As a result, all of the horizontal Gable end bracket, northwest gable members have rotted at the end away from the building that is exposed to the weather. While they serve but a small structural purpose, they are critical decorative elements of the Chateau.
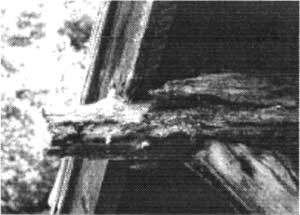 Typical decay of gable bracket end. |
The rot at the ends of the brackets extends back toward the building past the intersection with the verge boards. The brackets and verge boards are notched to accommodate one another, and water is allowed to puddle at this point, decaying both members. This intersection is also directly above the intersection of the diagonal and horizontal members of the bracket. The end grain of the diagonal member is vulnerable at this point, and in some cases the member has begun to decay.
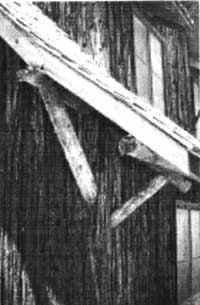 Verge board and brackets. |
The verge boards present at the gable ends is formed by 2" x 8" dimensional lumber. These members meet at the peak of the gable, and are painted a reddish color that slightly offsets the color of the Port Orford cedar bark siding. These members are compromised only where they intersect the brackets, and there are pockets of decay at all bracket intersections. These pockets vary in size and severity throughout the building. The paint on the verge boards has failed, allowing excess moisture into the boards.
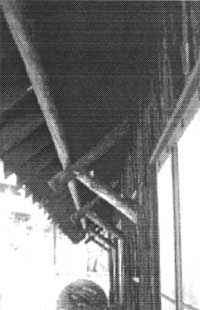 Purlin and brackets, north side. |
The peeled log purlins are present under the eaves, tying the rafters together. These members are painted to match the sheathing under the eave, and are in good condition throughout the building. They are supported by triangular brackets, and support the exposed rafter tails. The purlin brackets are peeled logs, left unpainted. The purlins are notched to receive the rafter tails.
Recommendations for Treatment: Brackets, Purlins, and Verge Boards
The brackets, purlins, and verge boards display various levels of decay. The purlins are protected from the elements, and as a result are in good condition. The brackets, on the other hand, have been subjected to the weather and require attention. The treatment of these three elements varies, but is consistent throughout the building.
The horizontal members of the log brackets are all in need of replacement. Excessive decay has rendered them useless as structural elements, and has diminished their decorative importance. The brackets should be removed from the building with care in order to perform this work, so the historic siding will be protected. The diagonal members should also be inspected at this time, and the decayed members should be replaced. The number of diagonal members needing replacement will not be known until the horizontal member is removed and the end grain can be inspected.
All verge boards suffer from a compromised paint coating. They should all be scraped and painted in situ, while the brackets are removed for repair. Any areas of decay at the intersection of the verge boards with the brackets should be repaired using a "dutchman" repair in which only a small portion of the board is replaced. This will protect the historic fabric from unnecessary removal from the building.
The under eave purlins are all in good condition. These peeled logs must retain the integrity of their paint coating to remain useful to the structure. The paint should be inspected on a yearly basis and repainted as necessary.
These elements should be properly maintained to serve their limited structural function, and also because they are primary decorative elements of the Chateau.
Chimney (Exterior)
The chimney for the Chateau passes through the roof on the north side of the south wing, towards the west end of the structure. It is constructed of local marble, blasted from the building site. It is roughly squared and laid uncoursed. The chimney holds six clay tile flues, all visible at the top. The top is built up with concrete to form a slope to drain the water off the chimney top.
The chimney flues provide ventilation and exhaust for the two fireplaces in the lobby, the boiler, and the kitchen. These rectangular flues are not capped, extending only 4" above the top of the main chimney structure. Water is allowed to run down these flues, and this is visible in the first floor on the south wall. The vent stack for the boiler runs through this wall and into the base of the chimney, where water stains are apparent.
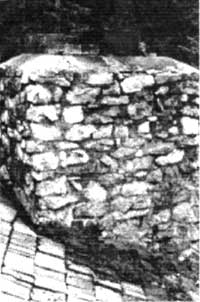 North side of chimney. |
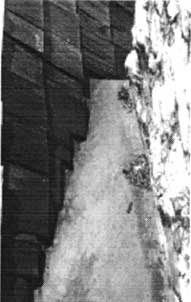 Sheet metal at south end. |
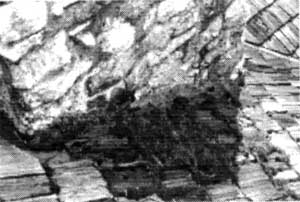 Growth and bituminous coating, north side. |
The squared marble is laid up with a fairly hard mortar. Some minor cracking is apparent in the mortar joints, but none are larger than 1/32". The uneven surface of the marble has allowed a limited amount of moss to grow on the mortar, primarily on the east and north sides.
The chimney is step flashed where it meets the roof on all four sides, including the south side where the sheet metal roof has been installed. This step flashing is woven into the shakes at every course, and is let into the mortar joints of the chimney. A bituminous coating has been applied to the north side of the chimney flashing, covering the flashing and lapping over onto the surrounding shakes.
Recommendations for Treatment: Chimney Exterior
The exterior portion of the chimney is in good condition overall, with only minor treatment necessary.
It may be worthwhile to cap the chimney flues to prevent water intrusion into the building. This should be done in a manner that respects the historic character of the Chateau, and should not detract from the appearance of the building.
A moss killer should be used to prevent the growth from damaging the mortar.
The bituminous coating should be removed from the chimney flashing and surrounding shakes.
This would ideally be accomplished when the roof is replaced, and new flashing is installed. Step flashing and counterflashing should be employed to provide a weatherproof intersection between the roof and the chimney. The bottom layer of flashing should be woven in with the shakes, rising at least 4" above the top of the shakes. The shakes should overlap this base layer of flashing by a minimum of 4". The counterflashing should be let into the mortar joints of the chimney, and a mortar of compatible hardness and strength should be used to fill the joint after the installation of the counterflashing.
Port Orford Cedar Bark Siding
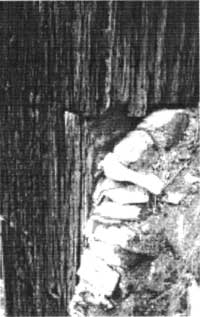 Exposed sheathing at northeast corner. |
The Chateau's siding is perhaps the character defining feature of the building's exterior. It consists of Port Orford cedar bark spiked to the sheathing below. It covers all of the Chateau's vertical surfaces, and is original. The siding gives the building its rustic, shaggy appearance, and must be preserved to retain the exterior integrity of the structure.
The base for the siding is 8" lap sheathing, laid horizontally and nailed to the light wood frame at the building's exterior. Building paper provides a barrier between the sheathing and the siding, and is present all around the structure. The bark is nailed to the sheathing using 16 penny nails at random locations. The bark itself is attached to the structure in uneven widths and lengths, custom fitted for each exterior element and opening.
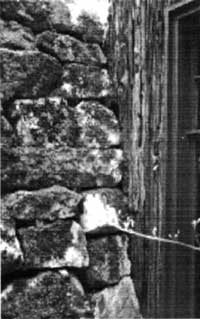 Moss growth at southeast corner. |
Overall, the siding is in good condition. A few areas are experiencing damage from excessive moisture, particularly near grade level on the north, east, and south sides of the structure. The east side is experiencing the most problems, as the roof runoff is channeled into the central portion of the building where it runs off near the pond. Water is allowed to collect on the ground at this location, and as the building lacks a gutter system the water falls over two stories and splashes back onto the siding.
The north and south corners of the east side are also experiencing problems. The north corner is missing a small section of siding where the rock retaining wall supporting the road meets the building, exposing the sheathing underneath. The south corner at the retaining wall has moss growing on the siding that has spread from the retaining wall onto the structure. Excessive moisture and the natural effect of moss growing on the retaining wall both contribute to this growth. The moisture is a result of snow being piled in this area when the road is plowed. The moisture is slow to dissipate as the wall faces north and receives no direct sunlight.
The south elevation, at grade level, has a number of small plantings between the building and the road. Moisture is trapped between these plantings and the siding, resulting in a microclimate that is damaging the bark. The siding in this area has a gray appearance, a more weathered look than the bark just a few feet above.
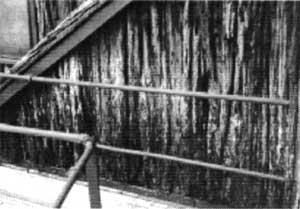 Growth at west stair enclosure. |
The north side is experiencing the same problem, but for a different reason. When the road is plowed, the snow is allowed to accumulate next to the structure. Heat escaping from the uninsulated building creates a similar microclimate, resulting in the same weathered gray appearance.
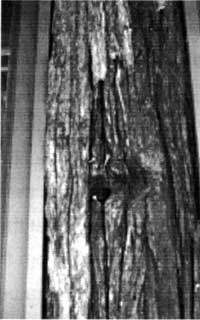 Siding fasteners. |
Aside from these areas, there are limited places on the west façade that have gaps in the siding, potentially allowing moisture to enter the building. These areas are at the intersection of the north and south wings with the central portion of the building, where the corners are slightly open. A few locations on this façade are also missing siding where the historic brackets for the wooden verandas were attached to the building. The west side is also experiencing problems at the enclosure at the stair leading to the basement. Runoff splashes back onto the siding off of the catwalk, and as a result the siding is experiencing a great deal of moss and lichen growth. This area also receives no direct sunlight, and is slow to dry.
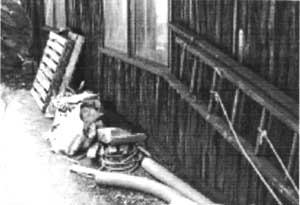 Siding at road level, north side. |
A final observation on the Port Orford cedar bark siding is the use of steel nails for attaching the bark to the sheathing. These may have been galvanized originally, but now lack a protective zinc coating. If they are allowed to deteriorate and oxidize, the fasteners could create small pockets of degradation in the siding, loosening the bark and making reattachment through the historic holes impossible.
Recommendations for Treatment: Siding
As the siding is a character defining feature of the building, it should be preserved at all costs. The Port Orford cedar is becoming increasingly difficult to find due to a root rot that attacks the trees, and there is no suitable alternative for replacing the bark with another material. The rot is a disease of the Port Orford cedar only, and is caused by a pathogen named Phytophthora lateralis. This fungus infects the fine root system and moves up the tree, eventually killing it. It has only a limited distribution around the Oregon and California border in the tree's native range. It is spread by water, especially in the wet seasons within drainage basins, animals, and vehicles. The rot has infected the Siskiyou National Forest, but has not been detected within the Monument. The siding should be treated as follows:
Protect the siding from excessive moisture. This includes improving drainage around the building and implementing means to avoid splashback on the structure. Snow should not be piled next to the building when the road is plowed on the north side, and the southeast corner should be kept free of snow accumulation. Vegetation on the south side is harming the siding, and should be removed.
Fasteners should be inspected regularly to ensure that they are not forming pockets of deterioration as they oxidize. If this becomes the case, the fasteners should be replaced through the historic holes with stainless steel, aluminum, or galvanized fasteners. The tannic acid in cedar is known to decay steel, so an alternative material may be called for.
Catwalks and Fire Escapes
The Chateau's catwalks and fire escapes are both replacements of original features. The original fire escapes featured log stringers with metal treads. These have been replaced with all-steel fire escapes on the west end of the north and south wings of the building. They have been painted a brown that is close to the siding color. As these are critical life safety devices and replaced original escapes in the same locations, they detract very little from the overall integrity of the structure.
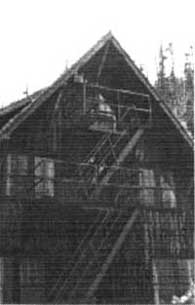 The existing fire escape. |
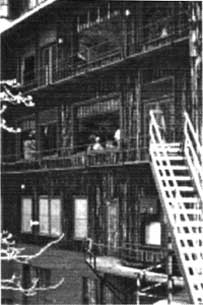 The existing catwalks. |
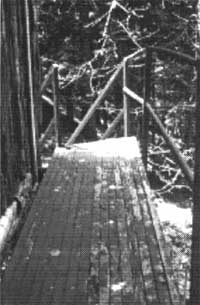 Catwalk pedestrian surface. |
The catwalks replaced the wooden verandas in 1958. These are steel frame structures bolted to the building with wood deck material. The walking deck surface is 2" x 4" lumber turned on edge and assembled in such a way that every other board is missing to allow water to run through the catwalk. These are also painted brown to match the fire escape, but the paint coating has been worn away on the wood walking surface.
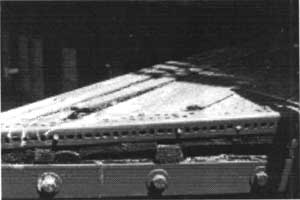 Uneven walking surface on the catwalk. |
Recommendations for Treatment: Catwalks and Fire Escapes
As these are critical life safety implements, these areas should be well maintained. They should be treated as follows:
Retain the paint coating on both the catwalks and fire escapes so they blend with the building, contrasting colors should not be allowed.
The wood deck of the catwalk is in need of paint, and the boards have bowed enough to create an uneven walking surface. The boards should be evened out and repainted to preserve them.
The catwalk installation following the removal of the verandas represents a significant loss on the west façade of the Chateau. The experience of the Chateau and visual impact would be heightened if the verandas were reconstructed using historic photographs and traces left on the building. The veranda was a character defining feature of the Chateau that was unfortunately lost, and although it would be expensive to replace the possibility should be considered to improve the appearance and character of the structure. Restoring this part of the building to its original condition would require a great deal of thought and care, but would be rewarding in that the building would once again appear as it did when it was originally constructed. The new veranda structure presents problems with respect to modern building codes. As Oregon has not adopted an historic building code, the reconstruction would have to meet modern codes. This could potentially require a steel structure with wood trim and column surrounds that matches the historic appearance of the veranda. A licensed designer must be employed to oversee this project.
Vegetation and Drainage
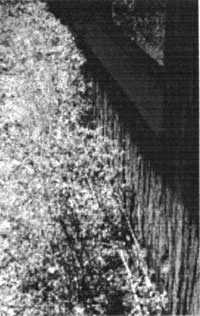 South side vegetation. |
The vegetation and drainage around the Chateau is causing some problems eluded to in Part D of this Section (Siding). Both are causing damage to the historic fabric by placing excess moisture on the Port Orford cedar bark. Vegetation on the south side to the east and west of the lobby entrance are creating a microclimate near the building, and as stated earlier should be removed.
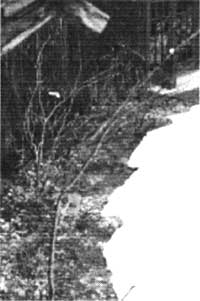 East side drainage. |
Drainage is another issue, requiring much more effort to remedy. This aspect is critical around the entire perimeter of the structure, as it lacks a gutter system. Currently the east side near the pool is the worst drainage problem. Water running off the roof collects on the ground between the sidewalk and the building, and splashes back onto the foundation and siding. A drain pipe is in place leading to the culvert that takes the majority of Caves Creek beneath the Chateau, but it is frequently clogged and not effective.
Proper grading could also benefit the Chateau. On all sides, soil is allowed to come into contact with the Port Orford Cedar cladding. These areas should be graded to prevent the soil from touching the wood cladding as it may accelerate the decay of the cladding.
The west side of the building is another area where drainage could be improved. The small terrace outside of the boiler room on the first floor retains a good deal of water, and the drip line is easily apparent in the soil.
Recommendation for Treatment: Vegetation and Drainage
Remove intrusive vegetation on the south façade of the building, and improve grading at all sides.
Install a french drain system of gravel beds and perforated pipe on the west side, allowing the water to drain out into the canyon below the building and join Caves Creek.
Install a similar drain system over the full length of the east façade, bringing water away from the building to a central drain pipe. This pipe should join the culvert already in place that diverts Caves Creek, and be designed in such a way that it does not easily clog or back up. This area is critical, as proper drainage will preserve the siding and prevent water from infiltrating the building through the foundation.
Windows and Doors (Exterior)
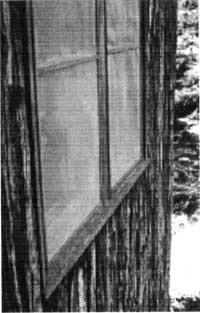 Typical exterior sill and screen. |
The openings in the Chateau at the exterior have received only modest alterations. Three doors were removed and replaced with windows on the west façade when the veranda was taken down in 1958, and one window was enlarged during the coffee shop remodel in 1954. Aside from these changes, the original windows and doors are intact throughout the structure.
The windows are a combination of types, ranging from large fixed panes to double hung sashes to casements. In all cases the historic sills and surrounds are intact, painted the same reddish brown as the verge boards. Removable screens are present on many of the double hung sash windows, exterior attached to the building with a hook and eye bolt system that fixes the screen in place.
Even though the majority of the screens are intact, a few have been damaged. Damage includes the separation of the frame members, holes in the metal screening, and damage to the frame from the installation process or from the screen coming loose from the eye bolts. There are a number of screens on the sixth floor windows that are lying on the roof itself, having come loose from their attachment points.
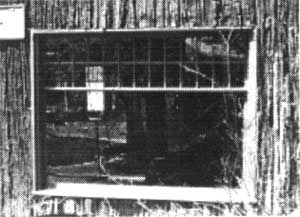 Typical fixed window. |
The window sills are formed by dimensional lumber set on an angle to shed water away from the building (i.e. they are weathered). No drip edge is present on the bottom side of the sills, and they project out from the building to varying degrees due to the irregular nature of the cedar bark siding. The sills and surrounds are all painted, but the paint coating is beginning to fail in the majority of cases. One sill is missing altogether. At the west end of the north wing on the second floor, there are three rooms used for employee housing. The center room is missing the sill from the southern window, allowing a great deal of air into the structure and making the space very hard to heat during the cold winter months.
The historic doors are present at many locations in the building, including the lobby entrance, dining room and coffee shop entrances, fifth floor fire doors, boiler room doors, third floor catwalk doors, fourth floor catwalk doors, and the kitchen and second floor doors to the exterior. New doors have been installed in the sixth floor openings leading out to the fire escapes. These are not full size doors, and fit within the opening of what was once a double hung window.
All of the doors are in good condition. The door out onto the fire escape at the fifth floor level of the south wing was inoperable at the time of the inspection (March, 1999). The concessionaire's maintenance supervisor stated that the door swells during the winter months, and when it dries it is fully operational.
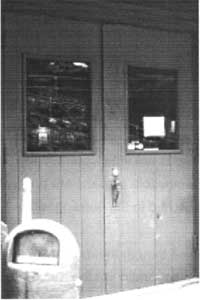 Lobby entrance doors. Note the bow. |
The lobby entrance doors are experiencing slight problems. Constructed of tongue and groove boards laid vertically with a steel bar at the inside edge of the east door, the doors have been re-hung on non-historic hinges. The doors originally pivoted on brass pins set into the head and jamb of the door, but now swing on modern hinges attached at the side jambs. The eastern door, which receives the most use, is bowing outward at the top on the west side. This prevents the door from providing a good seal, allowing air infiltration. However, the door is still fully operational.
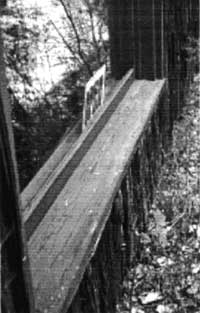 Sill north of the Coffee Shop door. |
The rest of the exterior doors on the Chateau are in good operating condition, with no deficiencies except the damage to the paint. The kitchen and boiler room doors are particularly subject to this, but they are out of the public view and receive less attention. New door hardware has been added to all of the exterior doors in the form of locks and handles. This provides a greater measure of security for the structure, and has generally been installed with a good level of respect for the historic door fabric.
Recommendations for Treatment: Exterior Doors and Windows
The doors and windows of the Chateau essentially suffer from deferred maintenance. For recommendations on glazing, glass, and frames see the windows section of the interior assessment. The exterior recommendations are as follows:
Replace the missing sill on the second floor, west end of north wing. This missing element allows air and moisture to infiltrate the structure, and is a potential cause for damage to the building.
Scrape and paint all exterior sills and frames. The sill to the north of the coffee shop door will require patching to make the surface flat, as the wood from the 1954 window addition is seriously weathered.
Scrape and paint the exterior doors in the non-public areas of the building, including the doors on the west façade leading to the kitchen, second floor storage area, employee dining room, and boiler room. This will preserve the historic fabric and reduce the likelihood that these doors will need replacement.
Remove the bow from the lobby entrance doors. The door will most likely have to be disassembled to accomplish this, and wood or metal bracing may be necessary to straighten the door.
The concessionaire has expressed an interest in restoring the historic hinge mechanism on the lobby entrance doors. A variety of pin hinges that mount in the head and threshold are available, but a brass mechanism should be used to reduce the risk of corrosion and to match the historic hardware.
Exterior window screens should all be firmly attached to the window frames using the eye bolt and hook hardware. Each frame should be removed from the building and inspected for loose joints and holes in the screening, then repaired and painted as necessary before re-installation.
| <<< Previous | <<< Contents>>> | Next >>> |
orca/hsr/part4.htm
Last Updated: 07-Nov-2016