|
Oregon Caves
Oregon Caves Chateau Historic Structures Report |

|
PART V
Interior Assessment and Recommendations
Fiberboard Wall and Ceiling Finishes
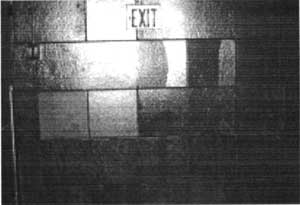 Typical interior hallway. Note the mismatched replacements. |
The Chateau's wall and ceiling finishes are fairly uniform above the second level. The dining room and lounge area, main lobby and office, main staircase, and all of the guest rooms are clad with a fiberboard product. The board was sold under the trade name of "Nu-Wood" by a manufacturer in Kloquet, Minnesota. The product was relatively new to the west coast when the Chateau was completed, according to then Manager George Sabin. The product is sometimes referred to as Celotex, which was actually a name brand fiberboard of the era and not the product used in the building.
The fiberboard panels used in the Chateau vary in size, but there are two main sheet sizes within the building. The walls and some ceilings are finished with 4-foot by 10-foot panels, cut down to fit as required. This allows all of the wall panels to span from floor to ceiling in the guest rooms, as well as from the wood wainscot to the ceiling in the lobby and dining rooms. The second size of panels is 16" wide by four feet long, used strictly on ceilings in the lobby, dining room, and some of the guest rooms. These sizes allowed the 1/2" thick panels to be conveniently nailed to wall studs and floor joists, both spaced at 16" on center.
The Nu-Wood panels feature varied incised designs. The large wall sheets in the guest rooms are slightly beveled around all four edges, with a 3/16" wide by 1/8" deep bevel. The smaller ceiling panels are divided into three sections by v-shaped grooves running across the width of the panel, 3/8" wide by 1/8" deep. The sheets are laid parallel to the direction of the joists, and nailed only at the outer edges. The large wall sheets in the dining room and lobby have reveals running longitudinally, but they are 1/4" wide and 3/16" deep. These are randomly spaced across the width of the panel to simulate the appearance of random width vertical board siding.
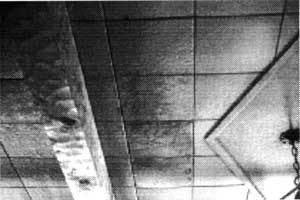 Water damage at the lobby ceiling. |
The panels are strictly an interior finish product. They are extremely susceptible to water damage and staining, which mars the appearance of the panels and causes them to disintegrate, as with many fiberboard products. The panels have also been subjected to impact damage in various locations throughout the building. The Nu-Wood was originally installed without a protective coating of any kind. In 1989 a fire retardant glaze was applied to the panels to increase their fire rating. The product, manufactured by the American Vamag Company is known as "Albert DS". On unfinished surfaces it is to be used with an undercoat, manufactured by the same company.
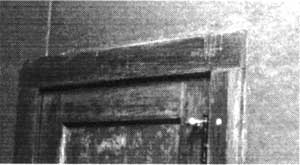 Glaze slopped onto door trim. |
The fire retardant glaze significantly altered the appearance of the panels, darkening their color and producing a shiny surface. The glaze is showing defects unassociated with the other damage to the panels. When applied, the glaze provides a thick coating, resulting in an increase in the fire rating of one hour. It should be applied in a number of coats, building up to the appropriate thickness. How the current glaze was applied exactly is uncertain, but it was applied with either a brush or roller. Careless application has resulted in the glaze slopping over onto interior trim, especially at the heads of doors and windows.
The thickness of the glaze and method of application has resulted in an uneven and bumpy appearance in many parts of the building. This is especially apparent in the guest rooms, which have only one central light fixture. The thick glaze has also developed a network of cracks in certain areas, similar to the crazing found in terra cotta glazes. Behind the radiators and above the electric baseboard heaters, the glaze has clouded over, most likely due to excessive heat.
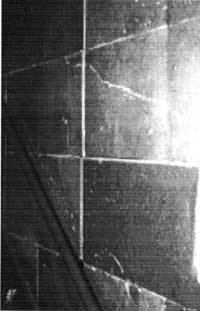 Abrasion damage at the stair. |
In addition to the problems with the fire retardant glaze, the fiberboard panels have suffered impact and abrasion damage. In the guest rooms, the impact damage can often be attributed to door knobs, as many of the stops are missing. In hallways and utility or linen closets, the damage is typically caused by housekeeping carts, rollaway beds, and other typical hotel equipment. Some of these areas have been patched with a replacement piece of Nu-Wood, either surrounded by small pieces of wood trim or left with the joints exposed. Many others, especially impact damage from door knobs, have been patched with wood putty. To make repairs in the public areas of the building, the concessionaire has removed panels from areas only open to employees, such as the office behind the front desk. The walk in freezer in the kitchen was placed in an opening historically used as an access to the coffee shop, and panels from the ceiling above the freezer have all been taken and placed in locations throughout the building to repair damage.
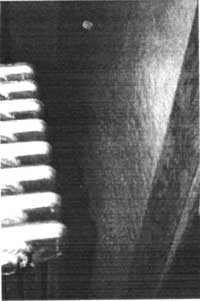 Glaze damage behind radiator. |
The panels also show signs of water damage, especially in areas under bathrooms on the floors above. When a leak develops, often the only way the concessionaire becomes aware is from water damage to the Nu-Wood panels. This damage is permanent and irreversible, unless the panel is painted over once it has dried. The areas under the window sills, particularly on the 6th floor on the west side of the building also show signs of water damage. A recent article in the APT Bulletin (Vol. 28 #2-3) notes that "the best conservation technique is careful maintenance...finishes must be maintained, and problems must be addressed immediately. Once the boards are warped or deeply stained, the likelihood of successful repair seems remote." (Page 67)
The 16" x 48" ceiling panels are placed either parallel or perpendicular to the damage joists and rafters above. Those that are placed perpendicular are experiencing sagging, as they are typically nailed only at the ends, with possibly one nail at each intersecting rafter or joist. This problem is apparent at the sixth floor, and at other locations in the lower guest rooms. The panels are attached with 4-penny finish nails without heads, and these have pulled through the panel itself in some of these locations, leaving the Nu-Wood to span 48" without intermediate support.
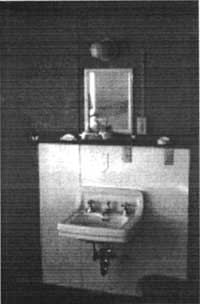 Painted sink surround, 6th floor. |
A few areas of the fiberboard have been painted to cover earlier damage with a color closely resembling the color of the glaze coating. Many of the sink surrounds, especially on the sixth floor, that still employ Nu-Wood have been painted white to avoid water damage. Room 214 is also painted entirely white due to a concession manager's cats that wreaked havoc on the historic wall surfaces.
Recommendations for Treatment: Fiberboard Finishes
The appearance of the fiberboard is currently not historic, even though the majority of the historic fabric is in place. The alteration was a life safety issue, but has become an aesthetic issue and a debate over the treatment of the historic fabric. A balance must be found between the preservation of the historic fabric and the realistic aesthetic concerns of the concessionaire. The interior appearance has a potentially direct effect on the occupancy rate of the hotel. The following recommendations are made:
Re-attach all sagging and loose historic Nu-Wood using small (4d) finish nails to replicate the original installation.
If replacement becomes necessary, remove pieces from the non-public areas of the building that have already been stripped of some of their historic fabric to supply the public portions of the building.
When replacement supplies are exhausted, replace the historic Nu-Wood with a compatible modern fiberboard product. Replacement in kind is not an option for the Chateau, as Nu-Wood has not been commercially available for some time. It has been out of production for at least 35 years, as replacement pieces for flood damaged areas could not be fabricated from the original product. The replacement material should match the historic in texture, color, composition, and detailing. The beveled edges and v-grooves must be cut into new replacement pieces to match the historic appearance of the panels.
One possibility should be considered if new material is to be introduced into the building. Historic fabric from one room may be sufficient to repair many areas of the building, if used and appropriated carefully. Removing all of the historic fabric from one room and replacing it with new material should be considered, as the new room would have a consistency in finish that may not be possible with piecemeal replacement. The historic fabric in other areas of the building could be retained under this option, and one room's historic fabric would be affected, instead of many areas of the building.
The use of paint to hide water damage has been employed in some areas of the building. Unattractive portions of the building may be painted to hide this staining. Natural divisions should be maintained between painted and unpainted wall surfaces. For example, where the walls have already been painted, one entire wall plane is painted up to a corner or projecting element. This strategy has been employed in the dining room and many of the guest rooms. This strategy would conserve the historic fabric, but not the historic appearance (which has been significantly altered by the application of the glaze). A matte finish paint should be used if the fiberboard surfaces are painted, in keeping with the historic character of the fiberboard.
It must be remembered that the Chateau is a National Historic Landmark sited on National Park Service property. Any alteration to the historic fiberboard wall finishes must undergo a Section 106 review to determine the impact on the historic resource. Cooperation will be required between the concessionaire, NPS, and State Historic Preservation Office to mediate some course of action. Work affecting the historic fabric must not be performed without the guidance and approval of the NPS and SHPO.
Other Wall Finishes
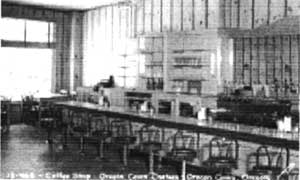 Knotty pin in the Coffee Shop. |
Aside from the fiberboard and concrete wall finishes described in other portions of the interior assessment, there are three other prominent historic wall finishes employed in the Chateau.
The first of these is present only in the kitchen area. A three-coat plaster system is present on the walls and ceiling of this room. The ceiling has been covered by acoustical tile, but the historic plaster is present under the tiles. A missing tile in the north end of the kitchen reveals the wood lath and three-coat system. The interior of the dumbwaiter also exposes the lath used in the walls, which is wood. The wall plaster is in good condition, and has received excellent treatment, as the area must be kept clean for food preparation.
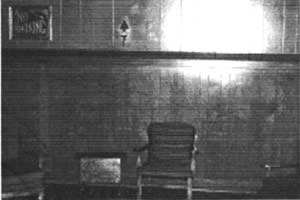 Replacement wainscot in the dining room. |
The coffee shop, adjacent to the kitchen on the third floor, holds the second of these three finishes. Knotty pine paneling is used on all of the walls in this room. Eight-inch wide boards are laid vertically, with beaded moldings incised into the edge of each board to enhance the decorative character of the pine. The boards run from floor to ceiling, and are covered at the base by a 12" molding, installed after the 1964 flood stained the walls. These panels are in excellent condition, with only minimal signs of wear.
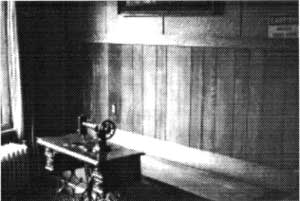 Original wainscot at the lobby level. |
The third finish is present in the dining room, lounge area, and lobby of the Chateau. Beneath the fiberboard paneling, a five-foot high wainscot surrounds each of these rooms. This wainscot is formed by vertical planks of redwood of various widths. The wainscot in the lounge section of the third floor (where the dance floor was originally) was replaced after the 1964 flood, and the materials had to be specially ordered. A narrow wood strip, stained to match the wainscot, caps this section of the wall finish. The wainscot on both levels is in good condition, with the exception of a limited amount of abrasion from furniture in both the lobby and lounge areas.
Recommendations for Treatment: Other Wall Finishes
These three wall finishes are in good condition overall, and should be maintained to ensure the longevity of the historic fabric. The plaster in the kitchen should be patched with a three-coat system and finished to match the historic fabric surrounding the patch. The knotty pine and wainscot should receive maintenance as required, but furniture should be kept a short distance (approximately one foot) from the wall to avoid potential abrasion.
Windows (Interior)
The windows in the Chateau create a link to the surrounding natural world, with a character that matches the style of the structure. Double-hung sash windows, casement windows, fixed windows, and hopper windows are the four types found in the building. The window types are generally determined by the use of the room in which they are located. The windows are all original to the structure, with the exception of four fixed windows. Three of these were installed when the verandas were removed in 1958, two on the fourth floor and one on the third. The window to the north of the coffee shop door was altered when the space was remodeled, and a large fixed window replaced two double-hung windows in the same opening.
Fixed windows are the dominant type in all of the public areas of the building. The lobby, dining room and lounge area, coffee shop, and main staircase all have large fixed panes topped by a series of smaller panes. The arrangement of the smaller panes is dependent on the size and location of the window, with one row of small panes over the large pane in the dining room, lounge area, and the upper landing of the main stair, and two rows of small panes over the large pane in all the other instances. The exterior finish on the window frames is paint, which matches the verge boards and sills mentioned previously. The small panes have glazing putty on the exterior, painted to match the surrounding frame. The interior finish is typically varnish on both the sill and the frame.
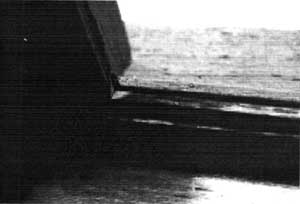 Finish deterioration and degradation at a fixed window. |
Slight problems exist in the fixed windows. The glazing is beginning to fail in most cases at the smaller panes, and is cracked or beginning to come loose. The interior finish is deteriorating at the bottom of the large pane in all cases. This deterioration is focused around the nails holding the frame in the opening. The nails are beginning to oxidize, resulting in wood degradation around the nails. The finish is failing at this point as well, and the failure is spreading outward from the nails. One window in particular needs mention. Due to the lean in the building, the frame of the lobby window that faces north (the only one that does) is out of square. The large fixed pane no longer fits within the frame, and small gaps have appeared at the top of the west end and bottom of east end. These gaps are currently filled with clear silicone caulk.
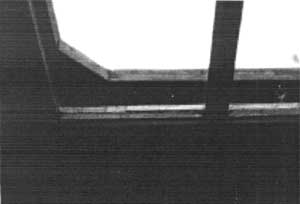 Missing glazing at a 6th floor fixed window. |
Fixed windows occur in only one other situation within the Chateau. In the 6th floor guest rooms, in the center trapezoidal section of the building, two casement windows flank a multi-pane fixed window. These windows are painted at the exterior in the typical color, but are stained green to match the doors and other interior woodwork on the inside. These windows typically display signs of putty deterioration at the exterior, and finish problems occasionally on the interior at the sill level. The putty in the bottom panes has deteriorated more rapidly than the top panes, as they are more protected. Moisture is infiltrating these windows at the bottom rail, resulting in mildew or fungus growth in some instances. The fixed portion in room 302 has been either refinished or replaced, as the finish does not match the surrounding casements.
Inswinging hopper windows exist over existing doors to the exterior or at the location of historic doors onto the veranda. The main lobby door, french doors in the dining room, and historic veranda doors all have these windows. All retain their historic hardware, and are operable. The hopper above the dining room doors is missing some of the trim that holds the glass in place, as this window is constructed without exterior putty to hold the glass in place. The window at the historic location of the door to the veranda does have glazing putty to hold the glass in place, and it is in good condition. However, the interior finish is failing at the bottom of this window. The historic door location in the lobby is constructed the same way, and is in the same condition. The main lobby door's glazing putty is also in good condition, but the paint is beginning to blister.
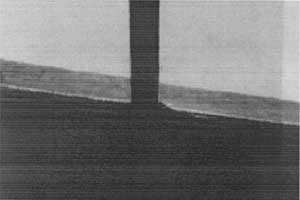 Fungal growth at a 6th floor casement. |
Casement windows are typically located in the guest room baths, and in the guest rooms themselves on the 6th floor. These, typical of the Chateau, are true divided lite windows. The exterior finish is paint, and the interiors are typically painted in the bathrooms and stained green in the main portions of the guest rooms. Two casements exist in the public areas of the building, at the upper landing of the main staircase. These two windows flank the central fixed window, and are painted at the exterior and varnished at the interior. The northern casement at this location has a broken pane. The original hardware typically exists on these casement windows, but it is causing damage to the frames. The windows are closed with the hardware in the locked position, and the wood frame is marred. Other casement problems are the glazing putty, especially in the windows on the 6th floor. These windows are also experiencing fungus growth and finish deterioration due to excess moisture. These frames, especially in rooms 301 and 306, are beginning to separate at the joints in the outside frame and intersections of muntins and mullions. Since these 6th floor casements swing inward, there is damage from the window hitting the radiator in room 303.
The bathroom casement windows are typically smaller, only 6-lite rather than 8 or 9-lite. These windows swing outwards, exposing the interior to the weather. Four of these bathroom casements have arched tops, and are present on the 6th floor in the north and south facing gable ends. Moisture in all of the bathrooms has caused the casement paint to blister, and the water trapped between the sill and the bottom rail has caused the bottom rail to deteriorate in room 202.
Double-hung windows dominate the rest of the structure. In the guest rooms, these are stained green to match the other interior trim and painted at the exterior. In the lower levels (floors 1, 2, and kitchen), the windows are painted on the interior as well. The double-hung windows have the original hardware and sash cords in place throughout the building, and are all operable. The problems that exist in these windows are typical throughout the building. The putty is cracking or missing in almost all cases, the latch hardware has damaged the muntins of the upper half, and the finish is deteriorating at the joints between the muntins and mullions and where the mullions join the meeting rail. Some of the interior sills have been refinished with a paint that does not match the historic stain, and in limited instances in the bathrooms and on the 6th floor the interior sills have suffered water damage and are deteriorating.
Recommendations for Treatment: Windows
As many of the windows exhibit similar problems, the work includes the vast majority of the windows in the structure. The following recommendations are made:
Inspect and repair the glazing putty at each window. The putty should be painted after it has cured to match the surrounding frame.
Re-finish the windows at the interior where the paint or stain has blistered or failed. The stain should match the original in color and hue.
Sand and revarnish the bases of the fixed windows on the interior. The depth and color of the varnish should match the existing finish.
Scrape and paint all exterior window frames. The paint color should match the historic color.
Scrape and paint all interior bathroom window frames.
Remove and re-glue all loose window frame elements. This work should be complete before other work is performed on the window.
Replace the trim holding the glass at the dining room's hopper window over the french doors. The contour should match the historic trim, and the new pieces should be painted to match.
Custom cut one piece of glass to fit the opening of the north facing lobby window. Install the new glass before other work is performed on this window.
Scrape and paint all interior bathroom sills. In areas of decay, a dutchman repair is necessary to preserve the historic fabric.
Hardware damage at the double-hung and casement windows should only be repaired using a dutchman repair. Wood putty or other methods of repair should not be used.
Interior Doors
The interior doors of the Chateau fall into roughly four categories: guest room and closet doors, fire doors, kitchen and coffee shop doors, and non-historic accordion-style doors.
The lobby office door and the opening between the coffee shop and dining room both have non-historic accordion doors. These doors run on tracks mounted to the timber frame above each opening, providing a measure of privacy for these service areas of the building. Both are in good working order, and are constructed with faux wood grain panels that do not match the historic character of the Chateau.
The kitchen and coffee shop doors are replacements of the originals. These four are hollow core modern doors. The doors between the kitchen and coffee shop are hinged to swing in both directions, and form a set of double doors. The doors between the kitchen and dining room are hung individually, each swinging in only one direction. Each is a one-way door, with the door into the kitchen on the west and the door into the dining room on the east. The historic doors functioned in the same manner, but were two panel doors matching the doors in the guest rooms.
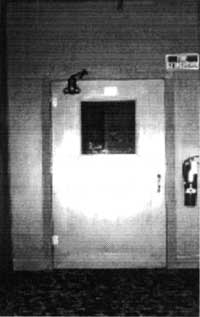 Typical Chateau fire door. |
The fire doors were added to the structure on the fourth and fifth floors. These steel doors are hung in walls added at the same time, as described in the Chronology of Alterations. These doors are in good working order, and are closed at all times. While they detract from the historic character of the Chateau, they are a life safety issue that was deemed necessary at the time of installation.
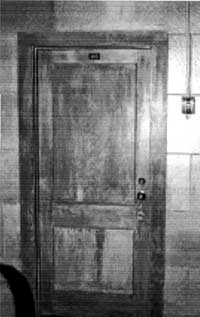 Typical guest room door. |
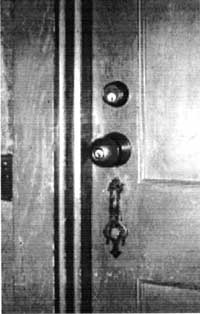 Typical guest room door hardware. |
There are two types of doors present in the guest rooms. Conventional hinged doors form the entrance to each room, and also lead into the majority of the bathrooms. These are two panel doors, stained a green color. The surrounding trim is comprised of simple boards, stained to match the doors. The door lock and handle hardware on the entrance doors to the guest rooms is not original on the vast majority of doors, as new locks have been installed as a security measure. Some doors retain their historic handles and plate, but the locks are all replacements. The historic hardware has been moved in all instances to accommodate the new locking mechanism.
The second type of guest room door is a pocket door, located between the rooms of all of the suites in the hotel. A limited number of bathroom doors are also pocket doors. These pocket doors are stained to match the other guest room doors, and are either two panel doors like the entry doors, or are solid single panel doors. All of these pocket doors are in good operating condition, with their original latch and track hardware intact.
The guest room doors are also affected by the lean of the building in the north wing. Doors on the fourth floor in rooms 102, 103, 104, and the linen closet on the south side of the hallway do not operate properly because of the lean in the walls, and two of these doors have been cut down to fit the irregular opening. The closet door in 104 and the door between 102 and 103 have been shaved down at the top and bottom to fit the door frame and retain some measure of operation. The closet door in room 102 will only open 1/2 way, jamming against the floor.
Recommendations for Treatment: Interior Doors
The four categories of interior doors present different preservation needs. The non-historic accordion-style doors should not receive any preservation treatment (except removal), and the historic guest rooms doors should receive the most attention. The recommendations are as follows:
Remove the non-historic and non-compatible accordion style doors from the lobby area and the doorway between the coffee shop and dining room. If a door is absolutely necessary at these locations, a door matching the historic character of the Chateau should be designed and installed. The installation of doors in these locations should impact the historic fabric as little as possible, and their introduction should be easily reversible.
The fire doors should be maintained as a life safety device. The paint color of the doors should be kept as close as possible to the color of the guest room doors so the presence of the steel doors is minimized.
The guest room doors should not have any more holes drilled in them. Relocation of the door hardware has resulted in many new holes in each door, some of which are hidden by the door plate. If new locks are required, they should conform to the openings that currently exist in the doors.
Doors that do not operate should not be shaved down to fit the opening or swing pattern. This treatment of the historic doors is completely irreversible. If the doors do not operate properly, temporary doors matching the historic doors in design and appearance should be substituted until the lean of the building is dealt with in some fashion. The historic doors that are removed should be stored in a secure location to be used as replacements for other historic doors that may be damaged beyond repair.
All doorstops must be installed and functioning correctly. The doors are causing impact damage to the fiberboard wall finish, and incorrectly positioned or installed doorstops are also causing damage to the doors themselves. All doors should be inspected for stops attached to the base molding on the wall behind the door. These stops must stop the door short of impact with the wall, and should have a cushioned head to prevent damage to the door. Doorstops mounted on the hinges of the door are marring the finish of both the door and the trim, and are not historically appropriate for the Chateau.
Heavy Timber Frame
The Chateau's heavy timber interior structure allows for the vast open spaces in the lobby, dining room and lounge, and coffee shop. This portion of the structure rises from the floor of the second floor through the third and fourth floors, terminating at the floor joists of the fifth floor. The main columns, measuring approximately 30" in diameter, support the main cross members running east to west through the structure. Secondary cross members run north to south over these, providing support for the floor structures of the third, fourth, and fifth floors. The columns bear on the concrete walls of the first floor, the spacing narrowing as the walls and gorge taper towards the east. The subtle gray color of the columns is due to airborne particles of cement that settled on the wood when sacks were beaten against them during construction.
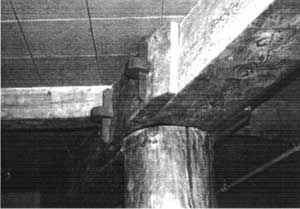 Simulated traditional joinery in the lobby. |
The main cross members, bearing directly on the top of the columns, measure approximately 18" x 24". All joints in these members occur over columns, and are covered with applied wood decoration that simulates traditional joinery but serves no structural function. This decoration is mounted with metal spikes behind the phony wedges and loops. The secondary cross members are attached to the main members with mortise and tenon joints at each end. The tenon is almost the full dimension of the secondary cross member at these joints.
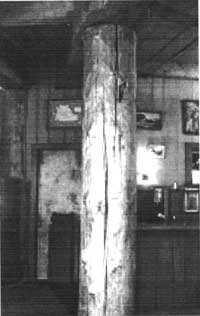 Typical heavy timber column. |
The heavy timber frame has been altered in two locations. During the 1954 remodel of the coffee shop, the column in the center of the room was replaced with a smaller diameter steel post to facilitate patron circulation. A steel plate is welded to each end of this post to provide bearing. The 1964 flood caused the collapse of the dance floor, and the main cross member (running east-west) at the south side of the north wing was replaced at the east end by two laminated beams resting on the original column. The east end of this replacement beam bears on the original shelf in the concrete foundation. The foundation has engaged rectangular concrete columns at the second floor level on the east and west walls with a notch to fit the end of the beams.
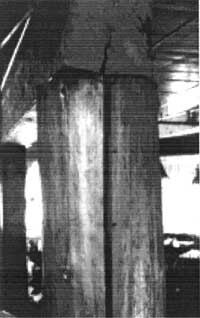 Check in dining room column. |
Taken as a whole, the heavy timber system is sound. There are only three areas of concern in the system, based on a visual inspection. In the dining room, the columns at the north end near the creek diversion are experiencing potentially serious checking. There is no lateral displacement of the overhead beams at this location, but the check runs almost all the way through the column and is approximately 3/4 of an inch wide at the outside edge. The beam above this column running to the east is also experiencing moderate checking.
Where the column was replaced in the coffee shop, there is lateral displacement of the main beams. These beams seem to be shifting on the steel plate, and not bearing evenly. The beam to the west of this column has been bolted together, as it was seriously checked. The third area of concern is in the lobby. At the north end of the reception desk, the beam to the east of the column at the corner of the desk is checking moderately.
A final note on the heavy timber in the lobby is that the columns are experiencing slight checking, but are suffering more from abrasion damage by chairs and objects carried through the space.
Recommendations for Treatment: Heavy Timber
While the heavy timber system appears to be performing well, there are a few areas of concern. The recommendations for the system are as follows:
An engineer should be employed to inspect the three locations where moderate to serious checking is occurring. These are located in the dining room and lobby, as mentioned above. The members should be analyzed to determine if they are performing as they should, and are able to carry their load. The members may need to be repaired or reinforced as required, possibly by bolting. The bolts in the coffee shop beams are intrusive and non-historic, and should have been installed in a more sensitive fashion. Recessing the bolt heads and inserting wood plugs over the bolt heads would make them less intrusive.
The columns in the lobby should be protected from abrasion, as it is destroying the historic finish on these members. Chairs should not be placed near the columns, and objects such as ladders and other maintenance equipment should not be leaned on the columns to rest.
Attic Space
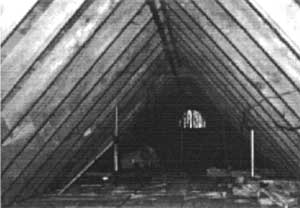 The main attic space. |
There are a number of attic spaces in the Chateau due to its complex roof forms. Lower attics are accessible through small doors in the ends of the sixth floor hallway, doors in rooms 305 and 311, and also through the bath rooms in rooms 305, 311, and 312. The main attic above the sixth floor ceiling is accessible through either of two hatches in the hallway ceiling. The hatches are recessed in the ceiling, and have the appearance of multi-pane skylights. However, the top side of the hatches are covered with plywood painted a dark gray so that the attic is not visible from the hall. The hatches have no hinge or latch mechanism, and must be lifted off of the frame and slid into the attic space for access. An electrical conduit just west of the hatch openings has caused abrasion damage and marring on the underside of the hatch, as it gets slid over the conduit and out of the way.
The roof framing and ceiling structure of the sixth floor are visible in the main attic. The rafters are full dimension 2" x 6" rough cut lumber, 24" on center. The rafters meet at the ridge, and there is no ridge member. The joists are 2" x 6" lumber as well, but spaced at 16" on center. The gaps between the joists have been filled with R-19 fiberglass insulation to hold the heat in the building.
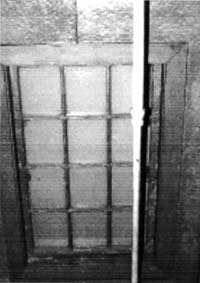 The south attic hatch. |
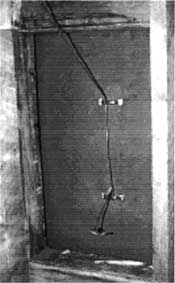 Roof access hatch wired to sprinkler. |
Two small dormers project from the east and west sides of the main attic space. These are framed with modern 2" x 4" planed lumber, and were added with the sprinkler system in 1950. The east dormer houses a loudspeaker, and the west dormer houses a large floodlight. The openings in the dormers are louvered panels, without screens.
The ends of the main gable have triangular openings, also covered with louvered panels. Wasp nests on the rafters and sheathing are apparent at both the north and south ends of the building, as the insects are able to enter the attic space through the louvered panels.
The lower attic spaces are constructed in the same fashion, but meet vertical wall surfaces. The diagonal members are tied into the wall studs. Where the main attic space lacks flooring, the lower attics accessed from the small doors in the sixth floor hallway have rough lumber serving as a floor surface, allowing storage within the spaces. All of the attic spaces are dry, and show no signs of water infiltration.
Recommendations for Treatment: Attic Spaces
The main danger to the attic spaces is water infiltration that can weaken the roof structure. The space is dry, even though the roof is in need of repair. The recommendations for the attic spaces are as follows:
Place screening over the louvered vents in the small dormers and gable ends to prevent insects from entering the building and constructing nests.
Develop a hinge system for the main attic hatches. The hatches, especially the one at the south end of the hall, are being marred by the conduit near the opening. Hinging the hatches would protect the historic fabric and reduce the likelihood of accidental damage to the hatch cover.
Main Staircase
The main staircase of the Chateau provides the primary visitor circulation between the third floor and the fifth floors of the building. It is located in the center of the east wall of the trapezoidal section of the building. The staircase construction is based on the heavy timber frame of the Chateau, and the motif is carried through this section. Two separate flights lead up from the dining room and historic dance floor area to an intermediate landing, where one flight rises to the west up to the lobby level. The stair ascends from the lobby to the east, reaching an intermediate landing directly above the lower landing. The stair turns again, rising to the west and up to the fifth floor level.
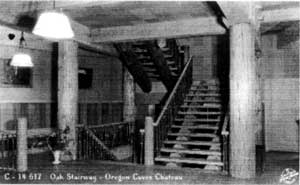 Historic view of the main staircase. |
The stringers for the stair are made from peeled Douglas fir logs. These logs are approximately the same size as the heavy timber posts, nearly 30" in diameter, and are notched to receive oak treads. Peeled log newel posts are bolted to the north-south heavy timber members supporting the lobby floor, intermediate landing, and fifth floor. The railing is constructed of madrone balusters, held in place by a fir handrail and let into the treads at the bottom. The space between the treads is open between the fourth and fifth floors, but the runs between the third and fourth floors have kickboards between the treads. These boards were original to the staircase, and also hide the service stairway to the second floor. The landings have narrow tongue and groove oak flooring, matching the treads.
The staircase is in good condition. Miscellaneous dutchman repairs have been made to the treads over the years, and the lower portions of the madrone and fir baluster were replaced after the 1964 flood. The stringers are all checked to some degree, but none are serious enough to warrant replacement or reinforcement. The treads are showing signs of wear from 65 years of use, but are far from needing replacement.
Recommendations for Treatment: Main Staircase
The main staircase is in sound condition, and requires no preservation work. If maintenance be comes necessary, it should be performed not only in accordance with the Secretary of the Interior's Standards, but should also be carried out with the care and precision of the earlier dutchman repairs and baluster replacement.
Concrete
The Chateau is grounded by a reinforced concrete foundation, which rises to form the exterior walls of the first and second floors. The system was poured in place using board forms and a variety of sizes of reinforcing bars. The exterior walls of the first and second floors are concrete, supporting the wooden structure above. A sill plate makes the transition to the light wood frame above the exterior walls, and the heavy timber system in the building bears on the north and south exterior walls of the first floor.
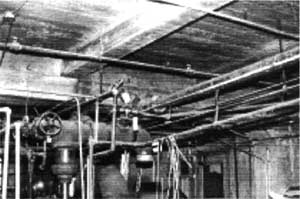 Boiler room ceiling structure. |
On the first floor, concrete also forms the boiler room ceiling and floor. The reinforcing bars are exposed at spalls in two locations, revealing the size but not the spacing or arrangement of the rebar. The ceiling is reinforced with #5 bar (5/8" diameter), and the projecting engaged columns supporting the heavy timber structure above are reinforced with #7 bar (7/8" diameter). The size of the rebar in the walls is unknown, as none are exposed. The ceiling is a monolithic slab, with larger concrete beams as part of the same pour running east-west. These two primary concrete beams are supported by engaged columns at both ends, and four freestanding columns in the east end of the room. The primary beams support secondary north-south beams, spaced at approximately 5-1/2' on center.
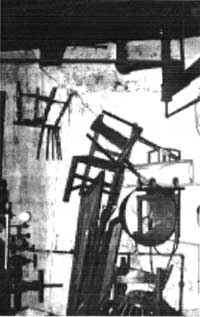 Crack in the boiler room, north wall. |
Five openings exist in the concrete walls of the first floor. On the north wall, a hole has been punched high in the wall to provide access to the crawl space beneath the second floor. On the south wall, the boiler exhaust pipe passes through the wall towards the base of the chimney. The west wall has three openings, one for a pair of windows and two for doors, one to the exterior and one leading to the stair up to the second floor.
The concrete of the first floor appears to be relatively sound. There are a few areas deserving attention, however. On the south wall just east of the boiler holding tank a small crack has developed, and is surrounded by a white chalky residue. Above this crack, the wall is stained by water infiltrating the basement via the boiler vent pipe. On Oregon Caves Chateau the east wall, near the north end, a small crack in the foundation is admitting moisture into the building, resulting in blistering paint on the wall surface and some fungal growth. On the west wall, at the south end of the window, a small crack runs from the sill diagonally down to the floor. This crack is experiencing some lateral displacement, less than 1/8". A major crack exists in the north wall at the east end, running floor to ceiling. This crack is up to 3/8" in some locations, with small cracks flanking the major fault.
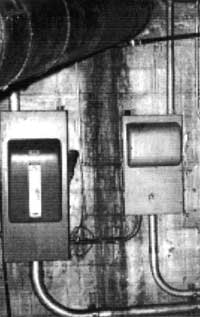 Water infiltration at the boiler vent pipe. |
The second floor concrete does not have cracks or spalls of the same magnitude seen on the first floor, but a number of smaller cracks exist in the walls and floor. The east wall, in particular, is problematic. Just north of the stair to the third floor, a horizontal crack exists about five feet off the floor, allowing water to seep through the wall and forming white chalky deposits. This water collects on the floor near the wall at the base of the stairs. About ten feet north of this, another crack runs vertically from the floor to the sill level, with a gap that varies between 1/16" and 3/16" and minor lateral displacement. No water seepage is visible at this point. Near the north end of this wall, the electrical service enters the building. Water is infiltrating the building at this point, forming a chalky deposit. The joint between the concrete floor and concrete wall is also allowing moisture into the structure just north of the stair. These cracks and seepage locations were observed on a day with no precipitation, except for snow melt running off of the roof.
At the south end of the east wall, in a storage room, an opening exists high in the concrete wall. This opening is boarded up, but allows water to enter the building. The concessionaire reported that the wood barricade has failed in this opening in the past, allowing water, mud, and debris to enter the structure. The top of the opening is below grade.
Recommendations for Treatment: Concrete
As the concrete forms the structural base of the Chateau, it should be given attention and protected. The following recommendations are made:
Improvements to the drainage system around the building will prevent water from infiltrating the structure through cracks in the walls, especially on the east side. Most of the water coming through the foundation is present on this side, due to improper drainage patterns. See Vegetation and Drainage, pages 53-54.
Exposed rebar in the boiler room should be protected from corrosion. The portions exposed should be cleaned to bare metal, treated with a zinc paint, and the spalls surrounding the exposed rebar should be patched. This will avoid corrosion of the reinforcing bars surrounding the spalled areas.
All minor cracks in the concrete walls should be patched after the drainage pattern is improved outside the building.
The opening in the south end of the east wall should be filled with concrete to avoid the failure of the wood again. The concrete should be board formed and poured in place to match the historic concrete surrounding the opening.
The crack in the west end of the north wall of the first floor should be inspected by a professional structural engineer. Monitoring should be performed to determine if the crack is static, or continuing to spread. This crack should be repaired or reinforced as necessary.
Systems
There are three main systems present in the Chateau, the boiler, plumbing, and electrical systems. All three have undergone periodic maintenance, repair, and alteration, and are currently in good condition.
The boiler provides heat through a series of radiators in each room of the building. The historic radiators are present throughout the building, and are painted silver. The paint coating is in excellent condition in all locations throughout the building, resulting in a handsome appearance for the historic fixtures. A 3000 gallon holding tank was installed for the system when it was converted to an oil burning system in 1946, and is still in place on the south wall of the boiler room. Aside from yearly maintenance and inspection by a professional, the boiler has received a new fire box. This was done in 1996, as the old one had disintegrated and lost some of its efficiency. The boiler system is supplemented in many guest rooms by the addition of electric baseboard heaters, resulting in an easily manipulated comfort system.
The plumbing system is original to the structure, with the exception of the sprinkler system that was added in 1950. Occasionally leaks develop within the system, and water damage occurs to the historic fiberboard wall and ceiling finishes. The concessionaire has had difficulty in locating fittings and connections to repair the historic plumbing system as these leaks develop. Modern connections are installed within the walls, and in places the historic fixtures must be removed because of the impossibility of finding the proper fittings.
The sprinkler systems are both not original to the structure. The rooftop sprinkler was added shortly after the Chateau was completed, and the interior sprinklers were added in 1950 (with additions to the system in 1961). The interior sprinklers received new sprinkler heads earlier this year (1999) as a code compliance requirement. The system was installed without regard for the historic fabric or appearance, and is a prominent eyesore in many of the rooms.
The electrical system is in excellent condition within the Chateau. In the 1987 concession contract, the company was required to upgrade the electrical service to the building. The interior outlets are all grounded, with new plates. This work was completed within the initial 10 year term of the contract. The only problem with the current electrical system is that there are only two outlets per guest room, and up to six rooms are served by a single circuit. The concessionaire is hesitant to install new outlets, as the historic finishes would be damaged (especially the fiberboard). This is the best approach, as the historic fabric may be severely damaged in the installation process.
Recommendations for Treatment: Systems
All three systems are in good working order in the Chateau. The systems should be treated as follows:
The electrical system and boiler should continue to receive periodic maintenance and inspection to assure that they are working properly.
The plumbing system should be carefully maintained to avoid leaks, and any preventative maintenance possible should be carried out to prevent damage to the interior finishes.
The two sprinkler systems should be regularly inspected and maintained as necessary to avoid leaks and damage to the building finishes.
Chimney (Interior)
The Chateau's chimney structure is only visible at two levels within the building. The chimney runs the entire height of the building from the second level through the roof of the south wing, but is hidden inside the walls at all levels except the second and fourth floors.
The second floor is the base of the chimney structure. At this point the chimney has been stuccoed and painted white. The stucco is in good condition, without any serious cracks visible. In fact, the stucco does not show signs of even modest cracking.
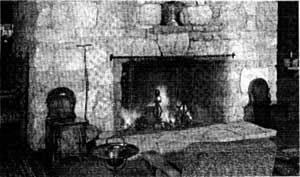 The eastern lobby fireplace. |
In the main lobby on the 4th floor, the marble of the fireplace is visible. The chimney and fireplace is a showcase for the lobby, dominating the southern end. It is formed from pieces of local marble, roughly squared and uncoursed. The east side of the chimney features a projecting shelf of marble, historically used to hold a small statue of a caveman. The west side features a small recessed area, representing the Oregon Caves themselves. There is a firebox on the east and west sides of the chimney at this point, both lined with yellow fire brick. The eastern firebox receives heavier use, as it is visible to patrons crossing from the main entrance to the front desk. There is a number of locations within this firebox that are missing mortar in the joints between the fire brick, and the bricks are slightly displaced and are beginning to sag on the west (back) side of the opening. Both of these fireboxes are spanned by steel channel, set into the marble.
The fireplace structure appears sound from all four sides. There are, however, two locations where small cracks appear in the chimney structure. On the west side, just north of the firebox opening, a crack is present along the edges of the mortar joints traveling vertically for approximately four feet. The crack has no separation to speak of; the bond between the mortar and the marble has been lost. The north side of the chimney houses another crack in the mortar, near the center of that elevation. Minor separation is occurring within this crack, up to 1/16".
Recommendations for Treatment: Fireplace and Interior Chimney
Generally, the fireplace and chimney construction still appears sound. The following recommendations are made:
The east firebox should be cleaned out and reconstructed, using the historic fire brick. The narrow mortar joints in the historic assembly should be replicated in the reconstruction. This will avoid potential problems with the chimney later, and cleaning the brick should coincide with chimney sweeping.
Both flues should be periodically swept to avoid chimney fires. This is especially important at the east firebox, which is more heavily used.
The cracks on the west and north sides of the chimney should be monitored to see if the cracks are continuing to separate, or if they are stable. If separation continues, a masonry consultant should be utilized to remedy the situation.
Floor Finishes
The majority of the Chateau's original floor finishes are either covered over or have been replaced. The only areas where the original finishes are present and exposed are the main staircase and landings, most of the guest room closets, and the first and second floors. The stairs and landings retain their original oak flooring, and the guest room closets have either 2" or 3-1/2" wood strip flooring. The first and second floors retain their historic unfinished concrete floors.
The guest rooms were carpeted originally, but the original carpeting has been replaced. The main lobby historically had a battleship linoleum floor, which is still in place under the current carpeting. The dining room's wood strip floor has been carpeted, and the historic maple dance floor on the same level was replaced by a plywood subfloor and carpeting following the 1964 flood. The flood also resulted in the loss of the parquet floor in the coffee shop, which now has asphalt tiles (as does the kitchen).
Recommendations for Treatment: Floor Finishes
As many of the floor finishes have been replaced, the historic flooring remaining becomes much more important in terms of preservation. The following recommendations are made:
Maintain the finishes at the main staircase, employing the same care and sensitivity as the earlier repairs if repair becomes necessary.
Maintain the exposed and stained wood finishes in the guest room closets as a record of the method of construction.
While the maple dance floor has been lost, the original wood floor of the dining room may exist under the current carpet. While the carpet is protecting the historic fabric, the restoration of this floor would contribute significantly to the character of the space.
The original lobby flooring exists under the current carpeting, and could serve as a basis for restoration. If this is pursued, the restoration should incorporate as much of the original floor as possible, and any replacement should be of a similar color and composition as stated in the Secretary of the Interior's Standards for Restoration.
Miscellaneous Elements
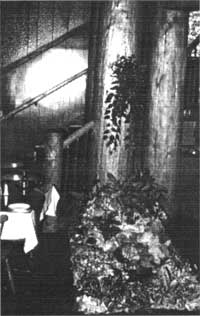 The Caves Creek diversion in the dining room. |
There are two elements not covered elsewhere in this report that are significant either to the design or operation of the Chateau. These are the dumbwaiter from the second to third floors and the creek diversion through the dining room.
The dumbwaiter runs from near the top of the stairs to the first floor up to the kitchen area on the third floor. It is original to the structure, and is still used to move flatware and foodstuffs from the storage areas on the second floor up to the kitchen. A dimensional lumber box moves within a shaft in the structure. A series of pulleys and ropes propels the box, operated by hand from either level. The device operates smoothly and efficiently, except when an overanxious employee gets the ropes moving too fast over the pulleys. The ropes have a tendency to jump off of the pulleys, rendering the dumbwaiter inoperable.
The diversion of Caves Creek through the dining room is a signature element of the building. A culvert brings the water from the lower pond through the dining room, where it is seen as an open trickle of water flowing over rocks and around ferns. This aspect of the building brings the natural world into the structure, providing a link with the surrounding landscape. The link is reinforced by the enormous picture windows in the west wall of the space. The concept of running a small mountain stream through a building and bringing the outdoors inside was not unique, but it was unusual and noteworthy. Laura Soullière Harrison, in her National Historic Landmark nomination, notes that "considering that the Chateau predates Wright's house "Falling Water' by two years leads me to think that the use of the stream running through the building was an honest response to the site, and not a choice made because the designer saw it in an architectural magazine and felt it would work here." (389) The creek exits the building through a drain pipe in the west wall, running down below grade and emptying into Caves Creek below.
Recommendations for Treatment: Miscellaneous Elements
These two elements of the building are noteworthy, and are both in good operating condition. The routine maintenance performed on each element should be continued to keep them operating efficiently.
| <<< Previous | <<< Contents>>> | Next >>> |
orca/hsr/part5.htm
Last Updated: 07-Nov-2016