|
CCC Forestry
|
|
Chapter V
FOREST REPRODUCTION
|
EARLY settlers of the United States cut off timbered areas, because they needed the land for agriculture. At that time there was plenty of standing timber and a small population. It would have been unwise to retain extensive forests where there was need for grain fields, orchards, and pastures. Today we need to retain our present forest areas, and in the future we can use forest products from increased areas. Forests for future use must be provided for in the present. The motorist who waits until his engine begins missing before buying gas may have to hitchhike back to town. If provision is not made for adequate forest reproduction, our forest wealth will vanish with the disappearance of our present forest areas. Thus we see the importance of reproduction as a phase of forestry. Trees grow from seeds or they sprout from roots or stumps. Sprout forests being less desirable than seedling forests, little discussion will be given here to sprout methods. Forests may be reproduced by either natural or artificial methods. To understand how reproduction takes place it is necessary to know the characteristics of seeds. KINDS OF SEEDS Tree seeds may be divided into two general classes—heavy and light. Nuts are good examples of heavy seeds. Stones of peaches and plums are also in this class. Seeds of black gum, dogwood, most pines, and maples are in the light group. Sycamores and willows bear very light seeds. Some heavy seeds such as hickory nuts and walnuts are protected by husks or outer coverings. Other seeds such as peaches or plums develop in pulpy fruits, which decay after maturity. Light seeds may grow in thin husks or in small fruits. Some are attached to wings or tufts of down, which enable them to be carried by the wind. |
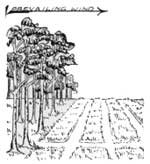
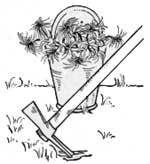
Formerly Forests Were Wasted.
| |
|
NATURAL REPRODUCTION |
||
|
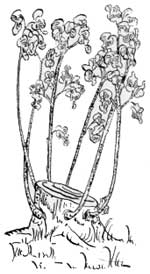
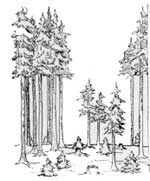
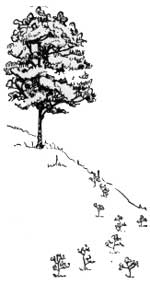
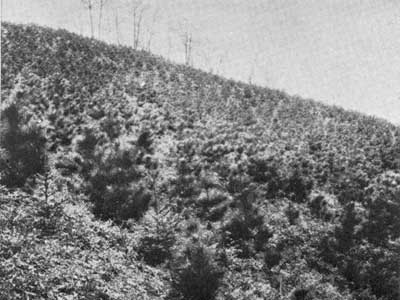
Natural reproduction is the renewal of the forest in Nature's own way. After selected trees have been cut from an area, seed trees left in the cut-over area or nearby scatter their seed naturally in various ways over the open ground and many seeds sprout and grow into seedlings. In forests that have never been cut over, many seedlings struggle for existence beneath mature trees, waiting for the forest canopy to open up, following the death of the overmature trees.
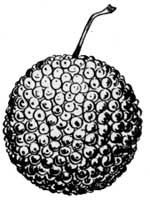
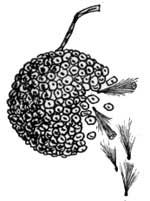
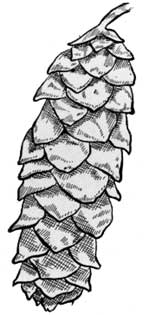
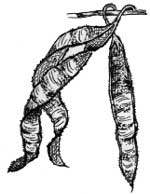
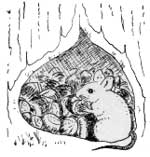
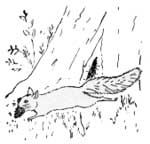
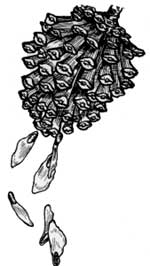
SEED DISPERSAL Seeds are scattered or disseminated in five ways. Wind helps a great deal in the process of natural reproduction. Many a youngster has thrown a stick or stone into the branches of a tulip tree in autumn to see the "flying geese." The seeds of tulip poplars are attached to wings which flutter and whirl as they fall, resembling minute flying birds. Pine seeds have delicate, transparent wings, and maple and elm seeds are also flyers. With the help of the wind, these seeds often travel long distances to start new trees. Willows, cottonwoods, sycamores, and some other trees have tiny seeds attached to tufts of down which, when aided by air currents, carry them great distances like little parachutes or balloons. Gravity assists in dispersing heavy seeds. By the time a heavy hickory nut falls 50 feet, strikes a branch and hurtles off against the trunk of another tree and bounds down a steep hillside, finally rolling to a stop, it may have traveled a hundred yards. Another seed, an acorn for example, falling on hard, level ground, may bound several yards away from the mother tree as a result of the velocity developed in its fall. Water is a third agent of seed dissemination. Seeds may fall in streams and take long journeys to be left on the shore to germinate. Little streamlets and heavy rains move and spread seeds about. Animals and birds play a part in Nature's seed broadcasting plan. Squirrels are probably the most active animals in tree planting. They not only carry seeds and nuts for long distances, but sometimes plant them. Other small animals also bury and hide nuts and seeds. These may germinate and a great many may grow. Seeds may be picked up in the fur of animals and carried long distances. Jays and woodpeckers carry seeds and nuts to storage places. They let them fall here and there, and many reach ideal spots for germination. Birds also eat berries and fruits containing seeds which are dropped later over a wide range. Mechanical means of scattering seeds is characteristic of some species. The witch hazel is probably the best example of such trees. When the seed container opens, the seeds which have been under pressure in the pod shoot from 15 to 40 feet away. Some beanlike seeds in pod containers are dispersed vigorously when the dried pods split open and twist. Thus Nature does her best to keep trees and plants growing on all the surface of the earth. But dissemination is not the whole problem. Seeds must germinate and grow before we can have forests. Trees not having sufficient vitality may produce partially matured seeds in which the embryo (life germ) has not developed. Droughts may cause seeds to be sterile or lifeless. Considering the fact that some trees require 2 years to develop seeds, that only 1 year in 3 or 4 is a good seed year, and that many seeds are not viable (cannot sprout), there are none too many good seeds produced even in a healthy forest. Many of these rot, are destroyed by worms, or are devoured by birds and animals. After good seeds are scattered they must rest in a spot suitable for sprouting and growing. There must be enough moisture to make the seeds germinate. One soaking is not sufficient—they must have continuous moisture. The seeds must be in contact with damp earth or leaves. The temperature must be right for growth. Seeds are sometimes stored for long periods in cold, running water, which shows that they must have warmth to grow. |
See Seed Testing, pp. 108, 109.
| |
|
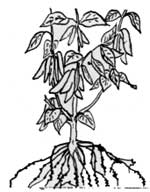
SEEDLING GROWTH The young tree may live for a while, fed by the seed from which it sprouts, but unless it is bedded on or in soil which little roots can penetrate and which contains sufficient food material, the seedling cannot live. In addition to food and water, the seedling must have light and air. A seedling must struggle constantly for its existence. It may put out its tender leaves too early in the spring and be nipped by a late frost, or it may be killed by the first cold winter. Heavy rains may wash the little plant from its moorings, or it may be deeply covered by leaves and debris and thus killed. Animals may feed on seedlings. Tender shoots are tasty food for rabbits, and squirrels know there is a nut or seed under a new plant. Diseases and insects are ready to prey upon young plants. Aphids live on tender roots and leaf beetles like young leaves. On the other hand, Nature has some means of protecting these seedlings. They may spring up sheltered by old logs. They may grow under protection of light brush and leaves until they develop strength. Forest leaves protect them from pelting rains and run-off and prevent freezing of soil in winter. Older trees protect seedlings from wind and frost. This is how forests are reproduced in Nature's own way. Trees, like people, seem to strive to keep their own kind in existence, and it sometimes seems doubtful whether man can improve upon Nature's ways. But natural means sometimes fail to give the forester what he wants, and so man has developed ways of helping nature to reproduce forests. This he should do since it is by man's fire and ax that forests have been destroyed. |
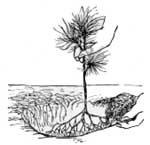
Good Seed, + Moisture, + Warmth, + Food, = Healthy Seedlings. Enemies of Seedlings.
Man Helps Nature. | |
|
ARTIFICIAL REPRODUCTION |
||
|
CHOOSING SPECIES Before seeding or planting forests, careful consideration should be made in choosing the species. It is not necessary to reforest an area with the same species that were removed. A farmer who has been growing corn may find later that he can produce oats more profitably. It would be wasteful under such conditions to continue growing corn. Likewise, the forest owner should choose the species that will best fulfill his requirements. In the first place, he must choose species adaptable to the climatic and soil conditions of his locality. The absurdity of planting tropical trees in Alaska, or willows in a desert, will illustrate this basic point. Secondly, he should choose from adaptable species those best suited to the particular object intended. There are three general objects for which forests are grown: (1) Watershed and other forms of protection. (2) The production of wood and other commodities. (3) Recreational purposes. As shown in Chapter II, forests may protect soil from erosion, streams from harmful fluctuation, and farm lands from destructive winds. In order to protect land from erosion, fast growing trees which have strong root habits should be chosen. Fragile, slow-growing species are not suited for this purpose. A mixture of species may be used. Fast growers with strong roots may be used to start. Black locust is good for this purpose. It makes excellent posts, which may yield a profit for the owner. A species which will bear heavy leaf crops may be introduced later to help build up soil and to retard the force of rain. In choosing trees for erosion control, future products and markets should be considered so that the cost of growing the trees may be borne in part by the products they develop.
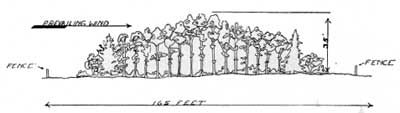
When planting for protection of watersheds any commercial species suitable for the soil and climate may be selected. If the proper species are chosen, the forest will furnish timber or other products after maturity, thus fulfilling a twofold purpose. Trees planted for protection against winds must be windfirm and tough. Trees with good root systems and tall narrow crowns are well-suited for this purpose. Cottonwoods are used extensive]y in the Prairie States. The Shelterbelt of the Prairie States is composed of many species, each having its own purpose.
For forest recreation, any of the better species which will thrive in the locality may be chosen. Some foresters prefer mixed, irregular stands; others think pure, even stands more beautiful. Trees planted purely for beauty, as in cities and parks, usually have full canopies, spreading branches, and heavy foliage. Maples, elms, oaks, and similar species are favorites in temperate climates. Planting for beauty only is one of the less important functions of forestry.
When adequate reproduction of desirable trees can be secured through natural means, there is no need for tree planting. On practically denuded areas where natural reproduction cannot be depended upon, or where weed species have taken possession, planting with commercially important trees is necessary. According to A National Plan for American Forestry,1 there are three principal reasons for tree planting on unproductive land: (1) For watershed protection—to prevent erosion and to regulate stream flow; (2) to meet future wood requirements and to aid stabilization of wood-using industries; (3) to aid in solving the social and economic problems of unwise land use—forest planting provides useful work for the unemployed, utilizes abandoned farm land unfit for agriculture, and increases recreational facilities. 1S. Doc. 12, 1933.
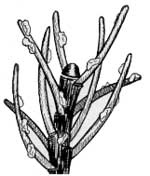
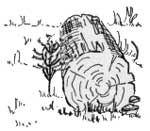
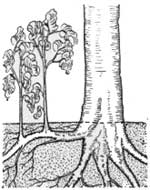
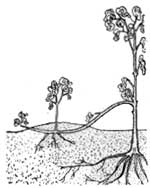
Trees may be grown from seeds or sprouts. Seed reproduction has been discussed in connection with natural reproduction. Sprouts grow from stumps of trees that have been killed or cut, and from roots. Root sprouts are commonly called "suckers." Some tree species such as aspen and oak sprout freely, others do not sprout at all. Sprouts may grow from new stumps to a height of 8 or 10 feet in one season. Bruising or cutting roots encourages sprouting and suckering. Layering is a process of bending and burying a section of a lower branch of a tree, or covering the branch with a mound of earth. A branch thus buried will sprout into an upright shoot or tree, and roots will extend into the earth. The connecting end of the branch should then be cut off. If soil is thrown up around the base of sprouts on a low stump, they will often take root. These rooted sprouts may be pulled from the old stump and planted. Some roots will sprout if cut in short sections and covered with soil. Some trees, such as willows, may be reproduced by cutting shoots or small branches and planting them in rich, damp soil. The methods of reproduction just explained are seldom used in forestry practice. There are two methods of artificial regeneration by seed—seeding and planting. Seeding is sowing the seed directly on land where a stand of trees is desired. Planting is the growing of seedlings in prepared beds and then transplanting them to the field. |
| |
|
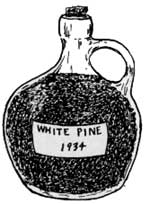
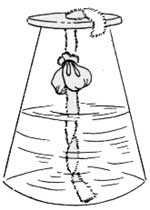
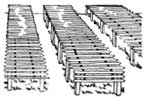
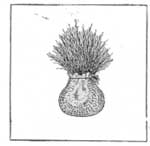
HANDLING SEED SEED COLLECTION There are commercial seed establishments which grow, collect, and sell seed. Usually, however, a forester can collect and prepare seeds for his needs, if the species he requires are available, cheaper than he can buy them. Special seed-tree plantations are sometimes maintained to produce seed crops only. In seed-harvest seasons, the forester in charge of a nursery sends his assistants and temporary workmen to collect seeds. The men with their equipment are divided into small crews and sent out, usually by truck, to points nearest the available seed areas. They go into the woods and gather the seeds by the methods to be described later. At the close of the day, the truck picks them up with their sacks of seeds, and carries them back to the nursery. Seeds may be collected (1) from the standing or felled tree, (2) from the surface of ground or water, or (3) from squirrel hoards. A great deal of climbing is necessary in collecting seeds from standing trees. Climbing spurs, ropes, and special tools, like rakes and pruning hooks, are used for this purpose. If seeds can be gathered on a logging operation, the cost of collecting will be less. Ripe seeds are likely to shatter off when the tree is felled, so that the majority of seeds other than those held in cones must be picked up from the ground. Lakes and streams in forests sometimes facilitate seed collection. Floating seeds may be collected by wind or water currents in quantities to be picked up by the collector. Squirrels are hard workers and usually store more hoards of nuts, pine cones, and other seeds than they need. A part of such hoards may be taken without depriving the animals of plenty to feed on through the winter. Squirrels climb to the top of tall trees and cut off cones. In late fall unopened cones are often found beneath the trees where squirrels have cut more than they have carried away. STORING Preparation: Nearly all forest tree seeds need some preparation before storing. Cones, nuts, and fleshy fruits demand different treatment. Small fruits such as dogwood, black gum, and black haw should be dried in the sun or in kilns, and sacked for winter. Larger, fleshy fruits like cherry and persimmon should be soaked in water and stirred until the seeds are separated from the pulp. Then the seeds should be dried for shipping or storing. Walnuts or hickory nuts may be pounded free from husks and placed in the sun to dry. Walnuts may also be run through a corn sheller to remove husks. Separating seeds from cones is probably the most difficult of seed-preparation processes. Cones should be dried in the sun or in kilns so that they will open and permit extraction of seeds. Sun heat is usually sufficient to dry and open cones, but they must be kept on canvas or frames to prevent ground moisture from retarding the drying process. They must be covered or taken indoors at night and protected from rain. Because of the care involved in sun-drying, it is better to build drying rooms or kilns if great quantities of seeds are to be handled. As cones dry, many of the seeds fall out. To get the remainder the cones should be put into shakers and agitated until all seeds are released. Shakers may be made from frames covered with wire mesh. They are turned by machinery or by hand and the seeds are caught on canvas below the shakers. The wings are removed (most of these are separated from seeds in the shaking processes) by rubbing through sieves. They may be further cleaned by fanning out the chaff, after which seeds are ready for shipping, storing, or planting. Storage methods: Seeds are sometimes stored 2 or 3 years. All tree seeds cannot be stored under the same conditions. Some seeds are well preserved and retain their viability (ability to sprout) at given temperatures, while others rot under the same conditions. Likewise, different seeds require different moisture content for preservation. Pine, hemlock, and maple seeds require dry atmosphere, while walnuts, chestnuts, and acorns require damp, cool storage. The nuts will shrivel and dry and the embryo will die in warm, dry storage. Some seeds when exposed to natural weather changes lose fertility (embryo dies) after a time. Seeds which have hard covering like walnuts, hickory nuts, and hackberries may be stored in layers in moist sand. This helps to soften the hard shell so that the seeds can sprout quickly when planted. The best plan is to provide suitable storage conditions for each kind of seed. To prevent humidity (moisture) changes, small seeds should be sealed in cans, bottles, or carboys. Large seeds should be put in cool bins protected from excessive changes in temperature and moisture. Cones may be kept in dry, open-air storage protected from mice and insects. SEED TESTING Before seeds are planted, they should be tested for viability. There are many types of seed germinators on the market. One way to test small seeds is to place a number of them between large sheets of blotting paper or heavy cloth, which are kept moistened in a warm room. After the seeds germinate, those which have not sprouted are counted and compared with the good ones. In this way, the percentage of viability can be obtained. Another form of testing apparatus may be made by partially filling a glass jar with water. A piece of flannel cloth is suspended from the top of the jar and extended into the water. This forms a wick which carries moisture up to the seeds which are placed in small, flannel bags and tied to the wick inside the jar. Several different species may be tested at the same time. The percentage of viability is determined as in the blotter method. Large seeds are best germinated in soil under natural conditions. Small beds are prepared and the seeds planted as in actual seeding practice. After they germinate, they are taken up and counts are made. In cold weather, or to insure better protection, a mixture of loam and sand may be placed indoors, either on the floor or in 4-inch trays, for seed tests. Care should be taken to keep the room at proper temperature (fluctuating between 50° and 80° F.) and the soil properly moistened. Tree seeds rarely exceed 90-percent viability, and range down to zero. Tree seeds may lie dormant for 60 to 90 days and then sprout; hence tests on all seeds should be made well in advance of planting seasons. The percentage of viability of seed stock will be a factor in determining the amount of seed to plant. |
Storage Requirements. Temperature in Storing. Moisture in Storing.
How "Good" Are Seeds? Blotter Method.
Testing by Planting.
Why Test Seeds? | |
|
DIRECT SEEDING Sowing forest seeds broadcast directly in the field eliminates the work of preparing seedbeds and the transplanting necessary in nursery practice. This is the one advantage over nursery practice. Direct seeding may be done by seeding the entire area or by spot seeding. Partial or spot seeding is designed to start seedlings in parts of a broken stand where there is no growth, or for seeding in spots or rows in the open. Seeds that ripen in the spring or summer should be sown in early fall if it is not too dry. Seeds maturing in the fall may be planted immediately to lie dormant all winter. However, if there are facilities for properly storing the seeds, they should be kept through the winter and sown early in the spring so that they may have time to develop sufficient root systems to support them throughout the dry months. Seeds that have been grown locally give better results than seeds grown under different climatic and soil conditions. Birds and small animals which eat the seeds constitute probably the greatest hindrance to direct seeding. Mice, moles, and chipmunks are efficient in finding seeds which have been planted. Sometimes a poisoning campaign before seeding will increase the chances for success; or seeds may be treated with red lead. Poor seeds rarely germinate when sown broadcast; but they may sprout in nursery beds where conditions for germination are better. Small seeds are sometimes sown broadcast on late snows. When broadcasting seeds in dry weather the chances for obtaining a good stand are unproved if the ground is plowed or harrowed. Seeds may be broadcast by machines or by hand. Seeding by hand has proved more practical. After seed is sown on prepared ground, it should be harrowed in. If the ground is not too rough, the seed may be drilled in lines with a horse-drawn planter. Furrows or strips may be plowed about 4 or 5 feet apart and seeds planted along the fresh furrows. Another method is to dig or loosen the ground with special tools in spots about a foot in diameter where the seed is to be sown. Large seeds may be planted in individual holes. The amount of seeds to be sown varies with species, condition of seeds (more old, weak seeds are required than fresh, strong ones), condition of soil, and stand desired. The amounts required for full and spot seeding are given in tables prepared by foresters.2 For direct seeding, the weights vary according to species. White oak may require 750 pounds per acre while western red cedar requires as low as 11-1/2 pounds, because the seeds are so small and light. 2Seeding and Planting in the Practice of Forestry, Tourney and Korstian, pp. 242-245. Spacing of plants from broadcast seeding depends on amounts used per acre. Planting spots should be 3 to 6 feet apart in squares or in rows. Close planting results in tall, straight trees, but thinning is generally necessary after the trees grow to sapling sizes. The protection of small seedlings from animals is necessary. A young plantation should be checked carefully and upon evidence of damage, rodents or animals should be excluded. Deer or rabbits can totally destroy a young plantation in a short time. Domesticated animals likewise can ruin plantations; a herd of sheep or goats can destroy a whole plantation in a few hours. The advantages of direct seeding are: Saving of time by use of seed rather than seedlings; saving of money which would be spent for seedlings bought from nurseries, or the outlay and expense of managing a nursery; trees that survive are hardy. The disadvantages are: More and better seed is required; better preparation of ground is necessary; longer time is required for complete stand because of poorer germination, destructive agents which attend direct seeding, and poor growing conditions. Because of these disadvantages, no very great success has been obtained from direct seeding. |
Drilled.
| |
|
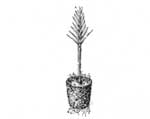
Planting seedlings is practiced much more extensively than direct seeding. It involves many of the phases of direct seeding and may include the varied functions connected with nursery practice. Seedlings may be taken from forests where they have developed naturally. Such seedlings are called "wildings." They can seldom be found in sufficient quantities for planting. Planting stock may be purchased from commercial nurseries or may be grown in nurseries of the tree-planting agency. In Europe where tree planting has been practiced longer than it has in the United States, large private forest tree nurseries have been developed, and the publicly owned nurseries are principally for research. In the United States, seedlings and transplants are grown largely in State and federally owned nurseries, but when commercial establishments have been developed to the point where they can furnish the required stock at prices suitable for reforestation, foresters probably will purchase seedlings rather than grow them. Nursery practice: Five major factors must be considered in establishing a nursery—climate, soil, water, transportation, and labor. Nurseries should be located in the climatic region in which the trees are to be planted. Nurseries may be protected from winds by locating them on leeward sides of high forests. Fences and walls also help to regulate the effects of climate. For the first season, seedlings are protected against wind, sun, and frost; but the protection is gradually reduced until the trees become hardy enough to plant. The soil upon which seedlings are developed must conform to specific requirements. The chemical components of soils may be changed by treating with fertilizers, but the basic conditions are rarely changed. Soils that are excessively acid or excessively alkaline must be avoided. Since plant beds must be made level or nearly so, level or gently sloping ground must be chosen. Low, flat areas that do not drain readily are unsuited for nursery practice. A successful nursery cannot be built upon heavy, clay soils. Such soil drains poorly, freezes and heaves badly, bakes and cracks in dry seasons, is difficult to work, and is too cold for proper germination. On the other extreme is a light, dry soil. Such earth cannot hold moisture or heat and is difficult to build up by use of fertilizers. Sandy loam is recommended. Soil that will support good growth of weeds or grass is basically good enough for nursery work. Such soil should be deep—free from rock or hardpan near the surface—and well drained. Water must be available for use on seed and transplant beds. Rainfall cannot be depended upon entirely, and irrigation is nearly always essential. Enough water must be available for the form of irrigation selected. This may be subirrigation (leading water under the surface in porous soil pipes), surface irrigation (running water through ditches and furrows to beds), and overhead irrigation (conducting water through pipes and sprinkling automatically on the surface of the beds). Small nurseries may be watered by carrying water and sprinkling by hand. A great deal of water may be necessary at a nursery site for preparing seeds, for livestock, and for domestic purposes.
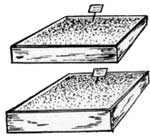
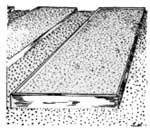
Nurseries designed to grow seedlings for an extensive area must have some means of transportation to distribute their product. Seeds, fertilizers, and supplies must be brought in. Pack animals and wagons are too slow and antiquated. The best locations, therefore, are those near railroads or highways. In the spring and fall, considerable labor is necessary. Since this labor is seasonal, full-time workers cannot be kept on the site. It is best to develop nurseries near villages or in sections where laborers, at relatively low wages, may be procured when needed. The size of the area required for nurseries depends upon the output and the species desired. It has been found that trees to plant a thousand acres of forest annually can be grown in a nursery of from 1 to 3 acres, depending upon species, age of planting stock, and method of planting. An area twice the size of seed and transplant beds is required in order to have adequate space for roads and buildings, and footpaths. Preparing soil: Seedbeds should never be made in soil that has recently supported sod or other wild herbage, as such vegetation contains too many insect larvae and weed seed. Soil preparation had best be made slowly. Stones, stumps, and roots should be removed, all vegetation plowed under, and agricultural crops sown. To increase soil nitrogen, leguminous crops such as peas and soybeans should be grown and plowed under. Sites chosen for beds may well lie fallow for a season while all weed growth is kept down. Such sites should be worked and cultivated until the ground is thoroughly loose. Depending on the composition and amount of humus, some soil types require more preparation than others. It may be necessary on weak soils to spend time and money building up humus and correcting chemical deficiencies. This may be done by crop rotation, application of manures and humus, and by use of commercial fertilizers. Because of the added cost to the cultural process, fertilizing materials should not be used until there is evidence that these elements are lacking in the soil. Seedbeds are those in which the seeds are sown for germination. Transplant beds are areas prepared for receiving seedlings which have been grown in a seedbed and which require more space for further development. Seedlings which have been "lifted" from seedbeds and transplanted, are known as transplants. Seedbeds and transplant beds require practically the same preparation. After the composition of the soil is made suitable for beds, it is worked thoroughly to break up lumpy soil. Beds are usually laid off about 4 feet wide in order that weeding and cultural work may be done from either side. Principal roads, wide enough for teams, should be left so that water and frames can be hauled near the beds. Paths wide enough for a person to walk without stepping on the plants should lead along all the beds. Beds may be flat if drainage is good, but on soils that retain water, a little slope may be provided by giving the bed a 2-inch crown. Most beds are raised 2 or 3 inches above the bordering paths. Sometimes they are surrounded by curbing made from treated 2 by 4 or 2 by 6 inch timbers, which helps to hold the soil and to keep out rodents. Some beds are made level with the ground surface, and where surface irrigation is used they are an inch or two below ground level. After they have been thoroughly cultivated seed beds should be rolled in order to make the soil compact. Sowing: Seeds are usually sown broadcast. Broadcast seeding results in more plants per unit area. The amount of seed to sow depends upon the species and soil. Tables, indicating proper amounts of seed, have been prepared.3 3Seeding and Planting in the Practice of Forestry: Toumey and Korstian, p. 316-319. In broadcasting, seed may be sown by hand or by machine. Hand sowing has generally proved to be the better method, but an inexperienced man is apt to distribute seeds unevenly by hand. Seed counts should be made on small, marked areas to check the quantity sown. Seeds that are not readily visible may be mixed with red lead so that the quantity sown may be checked and even distribution may be obtained. It is almost impossible to get an even distribution of seeds when there is a wind blowing. After seeds have been sown, it is a good plan to roll the beds with a light roller so that the seeds will not blow away or be moved in the covering process. Firming the bed also aids in germinating seed. Small seeds should be covered lightly with sand. Large seeds such as walnuts or acorns may be covered deeper with soil. Sand may be applied to beds by sifting or scattering it with a shovel. In large nurseries mechanical sanders drawn by manpower or horsepower may be used. Sand prevents surface-hardening, which often hinders plant development. In small nurseries seeds may be drilled. The seedbed preparation is the same as for broadcasting. The drills are made across the beds from 2 to 6 inches apart depending on the kind of seed to be sown. Drills may be made by drill markers or rollers. Large seeds, such as walnuts or chestnuts, should be planted in deep drills about 4 inches apart. Small seeds should be in shallow, broad drills 2 inches apart. Seeds are distributed by hand along the drill. Care should be taken to space them as uniformly as possible. A seeding trough may be used to facilitate even distribution, in which case seeds are distributed by hand in the trough and then allowed to fall from the trough directly into the drill. There are a number of seed-drilling machines on the market. These are practical in large beds where the drills are long and widely spaced, but for small beds and narrow drills hand seeding is the better method. Seeds are covered in various ways and at different depths, by closing the drills or scattering loose sand over the bed. Covering material may be spread over large seeds with a hoe, but for light seeds a light rake or a hand roller devised for covering is used. In order to prevent excessive drying, damage by beating rains, and ravaging by birds, the beds should be covered with pine branches, leaves, straw (free from seeds), burlap, or canvas. This mulch should be removed as soon as the seeds germinate.
Care of beds: After seeds germinate, the beds require constant care. In the first place, they must be kept moist. Failure to water beds properly may result in partial germination. Seedlings should be watered before withering and drying set in. Sprinkling is the best method for small plants. Thorough waterings give better results than frequent sprinklings on seedlings that have developed a degree of strength. Too much watering may cause root-rots, damping off, or other diseases which damage nursery stock. Plants which have had too much water are weak and overgrown, and may be too fragile for transplanting. Coniferous seedlings require partial shading from hot sun and at times complete shade is necessary. They are usually shaded with laths or thin strips of lumber held on frames over the beds. These are usually held together by wire and may be rolled up for handling. Brush and branches, and sometimes scrim or cheesecloth screens are used. To protect against flying insects, birds, and rodents, wire screening is sometimes used to cover beds. Five or six weeks after seed germination, seedlings should be thinned if they are growing too close together. They may be pulled by hand, but if the soil is so compact that plants nearby are displaced by pulling, the seedlings to be removed may be clipped out with shears. Modern nursery practice, if properly exercised, should eliminate necessity for thinning. The root systems of seedlings may be strengthened and developed by pruning them while in the bed. This is done by cutting off the roots 5 to 8 inches beneath the surface of the bed with special root-pruning machines. Winter protection of beds seeded in the fall requires mulching with burlap or straw. Burlap is better in climates which are not too rigorous, because mice and moles often make winter homes in straw mulch, and damage the plants. Beds left uncovered may freeze and thaw so much that seeds are heaved from the ground before they germinate. Covering should be removed when germination begins. First-year seedlings in beds should be protected in like manner. In sections where snow may be heavy lath screens may be placed over the beds. Enough snow will filter through the lath to protect the trees, but the burden of snow weight will be reduced. Where there are many weather changes and heaving freezes, heavier mulches of straw or other material should be used. Transplanting: Seeds are sown in seedbeds in sufficient quantity to produce a reasonably dense stand. When they become large (after their first to third year), they may be transplanted to other beds because better development of stock is desired or because there is no present demand for them. Efforts should be made to transplant trees to the field before they become too large to be valuable as forest-planting stock. Seedlings are usually transplanted in early spring. In the North, where snows stay on late, black soil may be sown on the snow over beds to hasten melting. A bushel of soil sown on a thousand square feet of snow may hasten melting by 10 days to 2 weeks. This permits nurserymen to start work earlier and gives the transplants a chance for early growth.
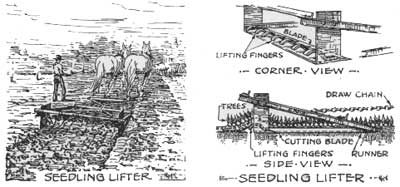
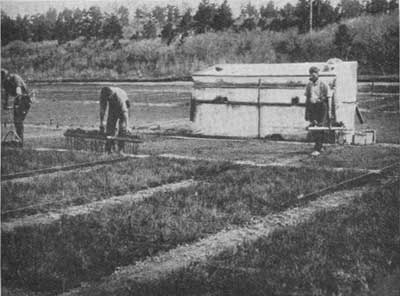
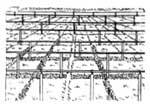
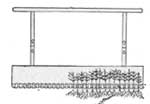
In lifting seedlings from beds, care should be taken to retain some earth on the roots and to protect them from drying. If seedlings are pulled directly from the ground, the greater part of the fragile, hairlike roots are stripped off. The plants should be lifted from below. They may be removed by using one of the various designs of shovels or lifting forks. In large nurseries, lifting machines may be drawn by horses or tractors. These have blades which cut beneath the seedlings and lift them on rods. They are then shaken free of excess dirt, and bundled or packed for handling. Precautions must always be taken to protect the roots from the sun and from drying winds. Ten or fifteen minutes exposure may kill so many rootlets that the plant cannot be reset successfully. Transplant boards are used to speed up operations in transplanting seedlings to nursery beds. The seedlings are strung in notches cut in a 6-foot board and carried to trenches made in the transplant beds. The boards are placed along the edge of the planting trench with the roots of the plants hanging free in the trench, soil is packed around the roots and the board is removed, leaving a row of trees evenly spaced in the bed. Sometimes "dibble" holes are made with dibble sticks or special planting hoes. In this method, each plant is set separately. Plants should be watered soon after transplanting and kept moist by the irrigation system used to insure proper growth.
Storing: Seedlings sometimes are lifted months before planting. They are "heeled-in" or stored until the time for planting or shipping. Heeling-in is a method of storing bunches of seedlings by covering their roots with dirt to keep them living until time for planting. They may be stored in cellars, in sheds, or in the open. They may also be stored in snow pits. Snow pit storing is done as follows: Pack snow into the bottom of a pit, preferably on a north slope. Cover the snow with leaves or straw, then with a layer of earth. Place the bundled seedlings in a layer and cover with earth and mulch. Pack snow on this and protect with brush. Young trees may be kept in such pits for months. Stored seedlings must have ventilation and regulated moisture. When they are in dry storage, some method of watering the roots must be used. Cold storage in commercial storage houses or in storage houses constructed on the nursery site has proved successful. |
Planting Stock. Forest Nurseries. The Seedling Crop Must Be Grown. Nursery Sites Must Be Carefully Chosen.
What Kind of Soil Is Required? Good Drainage Necessary. What Should Be the Condition of the Soil? Loose Loam Best. Is Water Necessary? Good Water Supply.
Soil Crop Rotation. Commercial Fertilizers. Nursery Beds. Laying Out Seedbeds. Plenty of Space Needed. Drainage.
Sowing by Machine or by Hand? Sowing the Seed. Seed Counts. Quantity of Seed. Firming the Soil.
Covering. Drills.
Scattering Seed.
Closing Drills. Mulching.
Shading Lath.
Thinning. Scissors or Shears. Root Pruning. Winter Protection.
Transplanting.
Heeling-in.
Cold Storage. | |
|
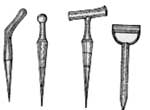
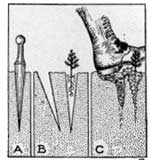
PLANTING METHODS Field planting is done in the spring and fall when the ground is moist. Many methods are followed, depending upon the species, soil, topography, and custom. For best results, seedlings should be planted with their roots in a natural position. They should be set in loose, rich soil. Such conditions cannot always be met, however, and most seedlings have to struggle against adverse growing conditions. A tree should be planted deep enough to prevent drying of the roots, but not deep enough to cover too much of the stem or any of the branches or leaves. A good rule to follow is to plant a seedling slightly deeper than it stood in the nursery bed. The method to use should be decided upon after consideration of these factors. Dibble planting is the fastest method and may be very successful in some soils, but is seldom used in this country. The percentage of growing stock surviving in a dibble-planting operation is less than for some other methods. A dibble is a tool for making holes in the ground for tree planting. There are several different varieties of dibbles—some are of wood, some of iron, and others are of wood with steel points. The better ones have handles attached that make them easier to use. In dibble planting, the workman makes a hole in the ground about 8 or 10 inches deep. The opening may be made larger by pushing the dibble from side to side. The roots of the seedlings are inserted to the proper depth and the dibble forced into the ground again an inch or two away from the plant. This closes the first hole and firms the soil around the roots of the inserted plant. The last hole may be closed at the top by the heel of the workman. This prevents drying of the ground near the rootlets of the newly set seedlings. In harder soils, a long-handled dibble (3-1/2 or 4 feet long), with a foot rest attached so that it may be forced into the ground by pressure of the foot and weight of the body, may be used. Sometimes hard ground is prepared previous to planting by plowing and cultivating. This makes hole planting much easier. Hole planting has four disadvantages.
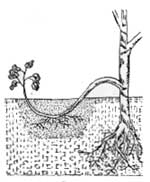
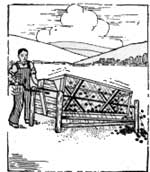
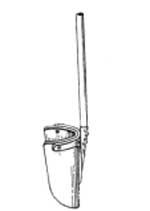
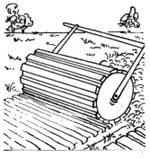
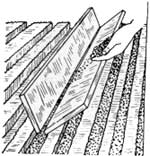
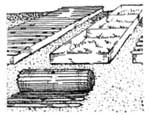
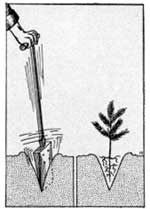
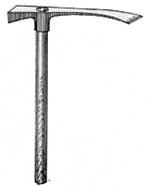
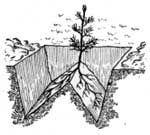
The one advantage of this method of planting, where it is feasible, is its speed, which reduces planting costs. For slit planting, like hole planting, there are different kinds of tools. Ordinary or special spades may be used. Slits are made, the plants inserted, and the openings closed. This method pushes the roots into a single plane, which is unnatural. Whereas dibble planting is a one man job, slit planting requires two men for the operation, one man making the opening and another carrying and inserting the seedlings. Hammer planting, a one-man operation, is done with a special short-handled tool, which is a combined hoe and hammer. The planter digs a hole and prepares it for planting. He places and holds the tree with his left hand while he rakes the soil around the roots with the hoe blade, then firms the soil around the roots by tamping it with the hammer. Under this method the roots are arranged in natural positions, which is impossible in the methods formerly described. A short-handled, light grub hoe will serve as a planting tool, the back of the hoe being used as a hammer. The most practicable method of planting for other than sandy soils is the grub hoe or mattock method. This may make the actual planting process more costly, but considering the different kinds of soils, the roots, stones and logs on areas to be planted, and the steep slopes with which it may be necessary to deal it is the best general method, as it allows proper position of roots. The final cost per acre of growing plants should be the basis for estimating planting costs. Planting crews are made up of two-man units. One man with the grub hoe or mattock digs the holes and prepares the place for planting. He may loosen the soil a little in the bottom of the hole if it is too hard, or he may cut any undesirable growth near the planting hole. He is followed by the planter, who carries the seedlings in a pail or a box. In any method, the seedlings must be carried in a container in which the roots may be kept moist. Special baskets or canvas receptacles are on the market for use in planting. The planter places the seedlings in the hole, brings the soil around the roots which are in natural positions, and firms it partially by hand, finally pressing it around the plant with his feet. He may carry a tamping mallet with a steel blade fastened on one end which he uses to scrape the soil back into the hole. He tamps it with a few light strokes of the mallet. Trench planting: In sandy soils, like those of the Lake States country, furrow or trench planting is largely used. The furrows are made by specially designed plows drawn by tractor or horse power. The trees are planted in the furrow by use of dibble bars or planting spades such as formerly described. If the field soil is extremely poor or dry, ball planting will be more successful than naked-root planting. Transplants are lifted from beds with a ball of the bed soil adhering to the roots. Care must be taken to keep the soil from falling from the roots. Planting in individual containers made of material which disintegrates rapidly such as cardboard or pressed clay is a form of ball planting. When planting balled stock, bigger holes must be dug; lifting, handling (often the soil around the roots must be wrapped in burlap, paper, or set in cups), and transporting must be done with extreme care. It is evident that the cost of this method would prohibit its practice except in unusual cases. The wedge system of planting, which is being tried experimentally in this country, appears to insure high survival of planted stock. With this system, a wedge-shaped mound of earth is left in the center of the planting hole, and the tree roots are spread on each side of the inverted "V" wedge. The hole is made with a shovel or spade, as shown in the sketch. Although it takes about twice as long to plant trees by this method as it does with some of the commoner methods, the roots have a better chance for development. Transplanting machines are coming into use, especially on level, sandy soils. They are drawn by horses or by tractors. A trencher opens the soil, and two men riding the machine place the seedlings at the proper depth. The dirt falls back around the roots of the plant, and packing wheels firm the soil on both sides of the transplant as the machine passes. Attachments have been designed to lift the trencher and planting apparatus out of the ground when obstructions are met. Machine planting promises to lower the cost of forest reproduction in some sections, but this method has as yet achieved little success, and most planting is still done by hand.
|
A Good Rule. "Dibbling."
How It's Done.
A Planting Bar. Disadvantages of Dibble Planting.
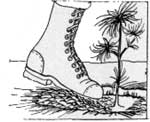
Steps in Tree Planting.
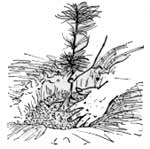
"Wedge" Planting.
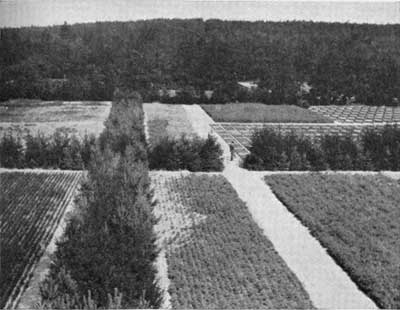
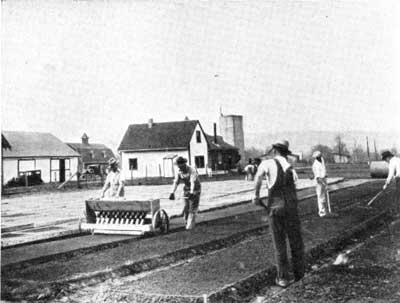
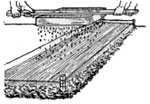
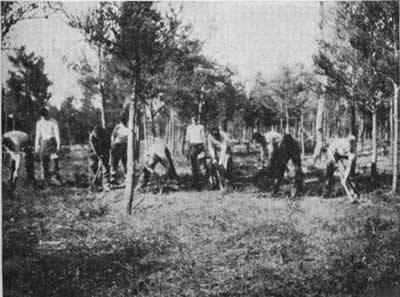
A planting crew in action. The men in the front line dig the holes and prepare the soil for the plant. The men in the back line set the seedlings. For Level, Loose Soil Only. Hand Planting Most Dependable. | |
|
SUMMARY When natural reproduction is inadequate, artificial reproduction is used. Such regeneration may be accomplished by direct seeding or by planting. The latter method is generally more practicable than the former. The fundamentals of nursery practice and the many methods of planting have been developed by foresters so that the process of reforesting may be done better and at less cost. |
||


| <<< Previous | <<< Contents>>> | Next >>> |
|
ccc-forestry/chap5.htm Last Updated: 02-Apr-2009 |