|
Forest Trail Handbook
|
|
SECTION VII.—MARKING
37.—BLAZING
Place Forest Service trail blazes so that they are visible to a traveler approaching in either direction. Graded sections, except in deep snow country, require little or no blazing. Ungraded sections should be carefully marked. Any more blazing than actually needed is a waste, and is often very unsightly.
Blazing should be done only as construction progresses. Trails into temporary camps should not be marked with standard blazes.
Table 4 specifies a system of marking Forest Service trails. It applies to all existing trails not adequately marked and to all new construction.
TABLE 4.—Marking systems
| Location | Character of markers in order of preference |
| In timber | (1) Forest Service blazes on both sides of trees; optional on graded trails, except in deep snow country. |
| Across meadows and other openings over 600 feet wide | (1) Posts, or posts and markers or stone monuments 300 feet apart (approximately). Blaze trees on both sides of the opening. |
| Both sides of fords | (1) Blazes on trees on both sides of trail; (2) posts, or posts and markers or monuments on both sides of the trail. |
| Above timber line | (1) Small rocks placed on larger ones commonly known as "ducks"; (2) monuments, 300 feet apart (approximately); (3) posts or posts and markers. |
| All other places where a traveler may be in doubt | (1) Blazes; (2) posts, or posts and markers or stone monuments. |
|
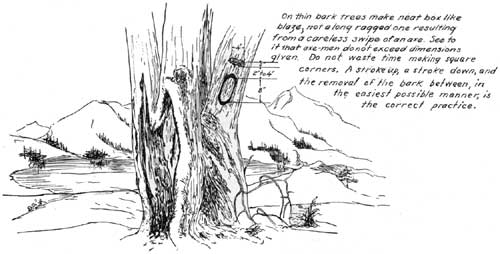
| FIGURE 24.—Trail blazes. (click on image for a PDF version) |
|
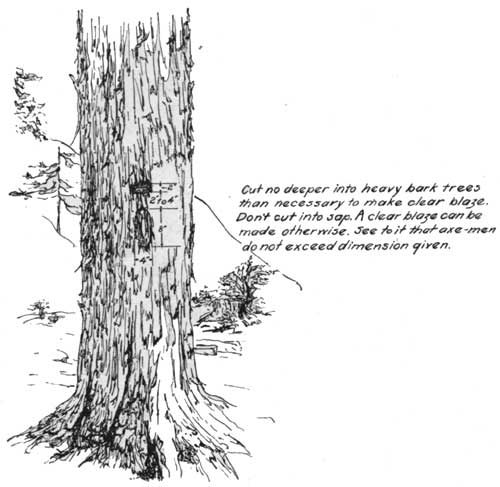
| FIGURE 25.—Trail blaze. (click on image for a PDF version) |
38.—SIGN POSTING
Simple and inexpensive markers are desirable on a main trail. The location of markers should be indicated as the construction progress is measured. If permanent signs are not available, use temporary signs. The roughest sign, lettered with charcoal, pencil, or crayon is better than none at all. The ultimate objective is to have metal signs of standard design for the Forest Service at all trail forks, intersections, fords, etc. (See figs. 26 to 28.)
|
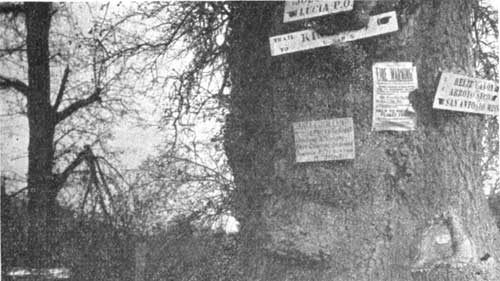
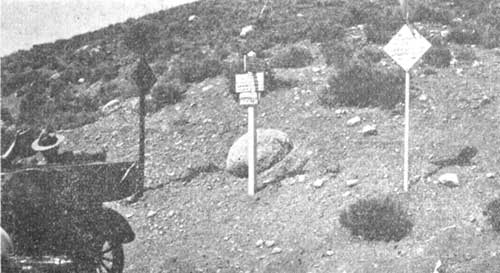
| FIGURE 26.—Example of carless practice in placing signs. |
|
| FIGURE 27.—Neatly place signs. |
|
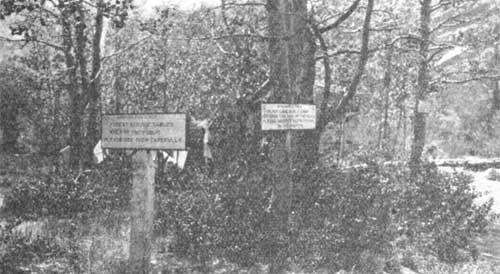
| FIGURE 28.—Example of duplication in placing signs. |
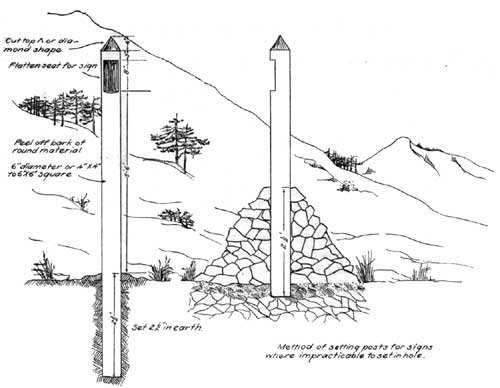
Use substantial posts of the most durable timber at hand, peeled, and well set, for signing all heavily used trails (fig. 29). Otherwise, put all the better types of signs on correctly located large trees wherever possible and never on a limber or crooked sapling or bush. Do not place signs on poorly located trees, such as trees out of line or ones bordering the trail, but 50 or more feet ahead of or back of an intersection of two trails. Never place signs lower than 5 feet, and, as a rule, not more than 6 feet above the ground. In regions of heavy snowfall, or in localities where damage by cattle is probable, heights up to 7 feet are approved. Metal signs should always be backed with boards and attached with screws, preferably blued screws, never with nails. The instructions on the mechanical features of sign posting may be summed up by saying: "Give sign posting the stamp of good workmanship."
AN AXIOM
At every intersection there should be at least TWO directional signs
|
| FIGURE 29.—Sign-board posts. (click on image for a PDF version) |
| <<< Previous | <<< Contents>>> | Next >>> |
|
forest-trail-handbook/sec7.htm Last Updated: 04-Jan-2010 |